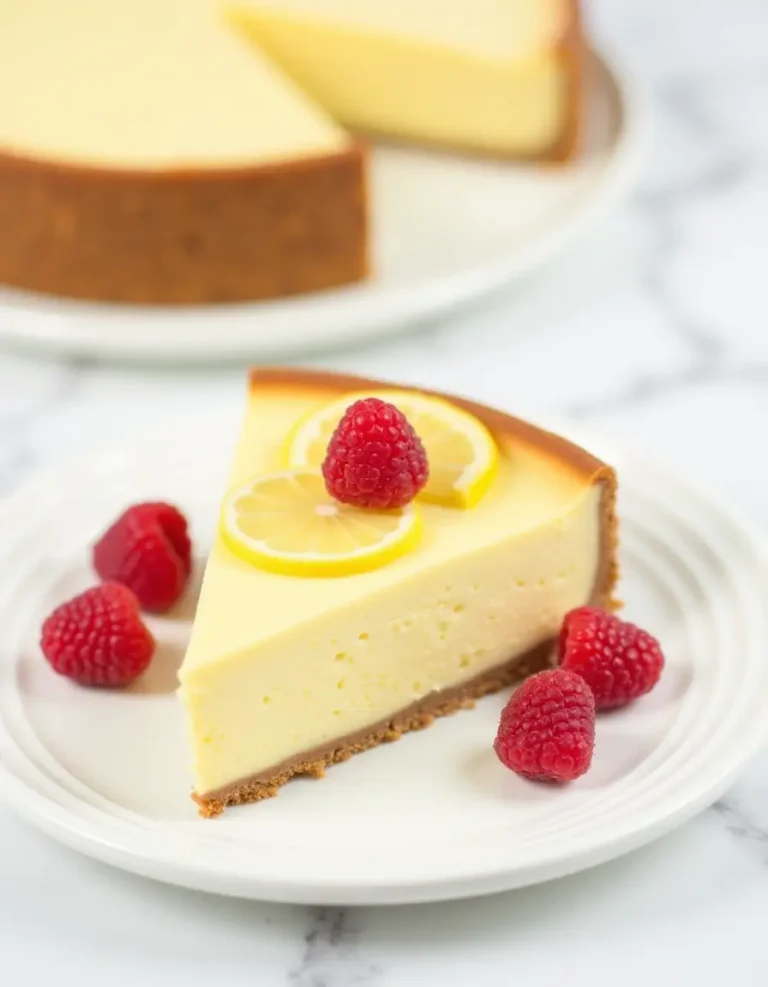
Easy Mini No Bake Cheesecakes: A Celebration in Every Bite
There’s something magical about desserts that don’t require an oven—they remind me of summers in Tuscany when it was too hot to bake, yet we still craved something sweet and celebratory. These easy mini No Bake cheesecakes have become my love letter to both worlds: the no-fuss American approach to entertaining and the Italian insistence that even the smallest dessert should taste like a special occasion.
I first made these for a potluck in Portland, nervous that my Italian sensibilities might clash with Pacific Northwest tastes. But you know what? They disappeared in minutes. Friends kept asking, “How did you make these so creamy?” The secret, my dear friend, isn’t complicated technique—it’s simply understanding that patience and cold cream can work wonders together.
Why These Easy Mini No Bake Cheesecakes Work Every Time
Let me tell you why this recipe has become my go-to for dinner parties, last-minute gatherings, and Tuesday nights when I just want something beautiful without the fuss. First, there’s no water bath to worry about, no cracked tops to hide, and no precise oven temperature to maintain. The refrigerator does all the heavy lifting while you sip your coffee or finish setting the table.
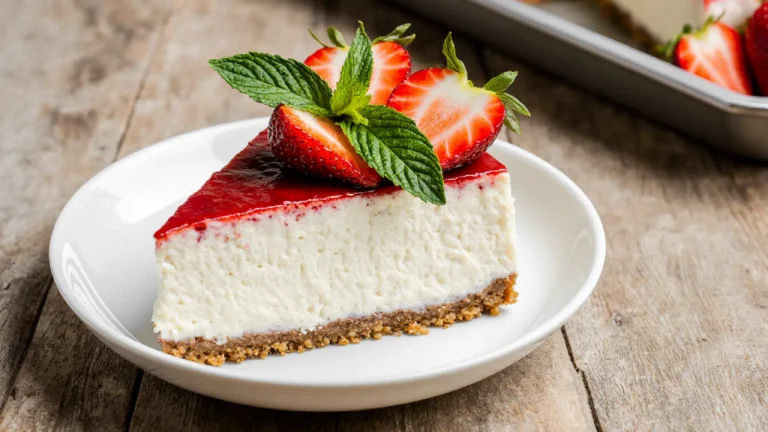
The beauty lies in the contrast: that buttery, slightly sandy graham cracker base against the cloud-like filling that’s been lightened with freshly whipped cream. In Italy, we might use amaretti cookies for the crust, but I’ve grown to love the honey-sweet warmth of graham crackers—they’re familiar, comforting, and they never compete with the filling.
These miniature cheesecakes are also wonderfully forgiving. If you’ve ever felt intimidated by traditional cheesecake (with its cracking and sinking and general dramatics), this recipe will feel like a gentle embrace. You’re working with simple ingredients, your hands, and a bit of faith that chilling will transform everything into something extraordinary.
The Method: Building Flavor in Layers
Creating Your Foundation
Think of the crust as the foundation of a small house—it needs to be sturdy but not overwhelming. I start by crushing graham crackers until they resemble coarse sand. You can use a food processor if you’re in a hurry, or place them in a sealed bag and let out any frustration with a rolling pin. Both methods work beautifully.
The brown sugar is my secret here—it adds moisture and a gentle molasses note that granulated sugar simply can’t provide. When you mix it with melted butter, you’ll notice the mixture clumping together like wet sand after a rain. That’s exactly what you want. Press about one and a half tablespoons firmly into each cupcake liner, really pack it down with the back of your spoon. This creates a base that won’t crumble when you take your first bite.
Now, I know the recipe says these are No Bake, and the filling truly is. But I’ve learned through many batches that giving those little crusts just five minutes in a 350°F oven makes them hold together better. Think of it as toasting bread—it’s a small step that makes everything sturdier. If you can’t use an oven, don’t worry. The cheesecakes will still be delicious; the crust will just be a bit more delicate.
Whipping Up Magic
Here’s where the transformation happens. Pour your cold heavy cream into a completely clean bowl—any trace of oil or residue will prevent it from whipping properly. Using an electric mixer, beat it on medium-high speed until stiff peaks form. You’ll know you’re there when you lift the beaters and the cream stands up proudly without drooping. This takes about three minutes, and it’s mesmerizing to watch. This whipped cream is what gives our cheesecake its signature lightness.
Set your whipped cream aside and resist the urge to taste it (or don’t—I won’t judge). In another bowl, beat together room temperature cream cheese and granulated sugar until the mixture is smooth as silk. This is where your patience matters. If the cream cheese is cold, you’ll end up with lumps that refuse to disappear. Room temperature is key.
Add your sour cream, a squeeze of fresh lemon juice, and vanilla extract. The lemon isn’t there to make it taste citrusy—it’s there to brighten everything, to wake up the other flavors and prevent the dessert from feeling too heavy. Beat until everything is unified and gorgeous.
The Gentle Fold
Now comes my favorite part, and it requires a soft touch. Take your beautiful whipped cream and begin folding it into the cream cheese mixture. Use a silicone spatula and cut down through the center, sweep along the bottom, and bring it up the side. Rotate the bowl and repeat. This isn’t vigorous stirring—it’s gentle persuasion. You’re trying to incorporate the whipped cream while keeping all those tiny air bubbles intact. They’re what make the filling so wonderfully mousse-like.
When no white streaks remain and the mixture looks fluffy and light, you’re done. Resist the urge to overmix. In Italy, we say “lascia respirare”—let it breathe. The same applies here.
Assembly and the Art of Waiting

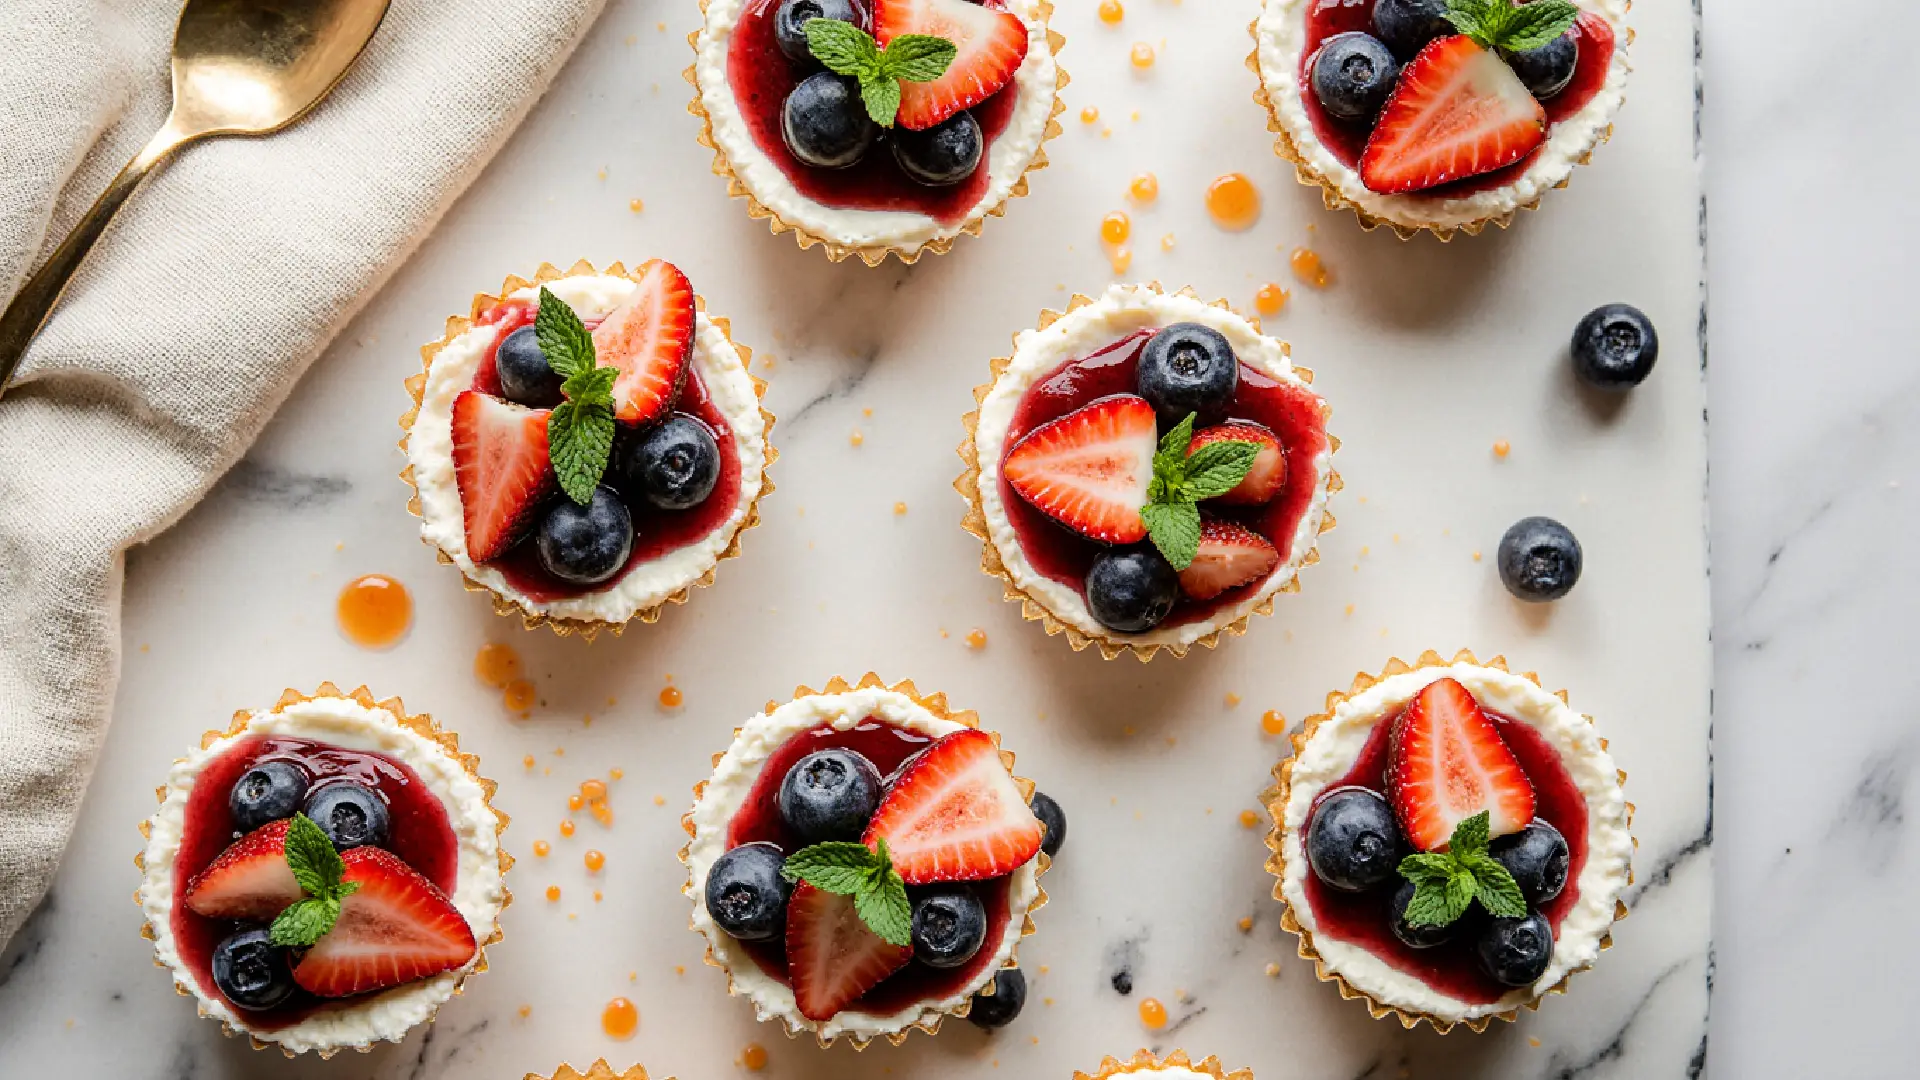
You can spoon the filling over your prepared crusts, but I’ve found that piping makes life easier and creates a prettier finish. Fill a piping bag fitted with a large round or star tip, or simply use a plastic bag with one corner snipped off. Pipe about two tablespoons of filling over each crust, swirling as you go if you’re feeling artistic.
Use the back of a spoon to smooth the tops—they should be flat and even, like tiny blank canvases ready for whatever topping you dream up later.
Now comes the hardest part: waiting. Slide both muffin pans into your refrigerator and let them chill for at least three hours. I know, I know—three hours feels like forever when you’re excited. But this isn’t time wasted; it’s time invested. The cheesecakes are setting up, the flavors are melding, and the filling is transforming from loose and airy to firm and sliceable.
If you can, make these the night before you need them. They keep beautifully in the fridge for up to two days, and the flavors actually deepen overnight.
Making Them Your Own
What I love most about these easy mini No Bake cheesecakes is how they welcome creativity. In my workshops, I encourage people to think of them as tiny stages for whatever flavors speak to their soul.
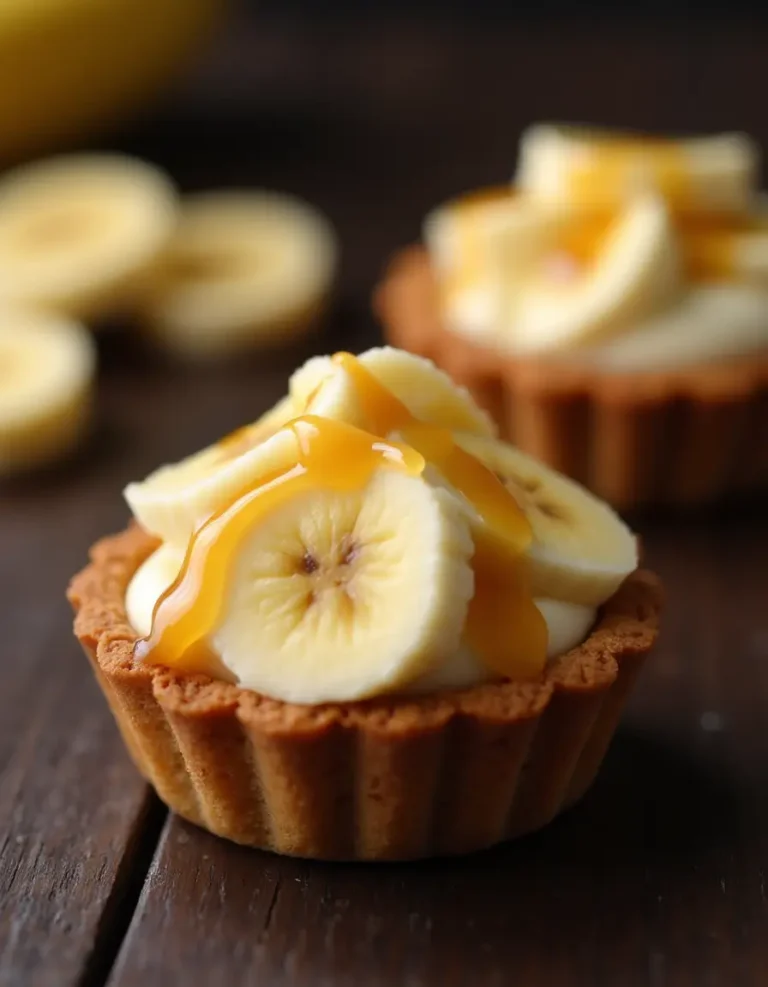
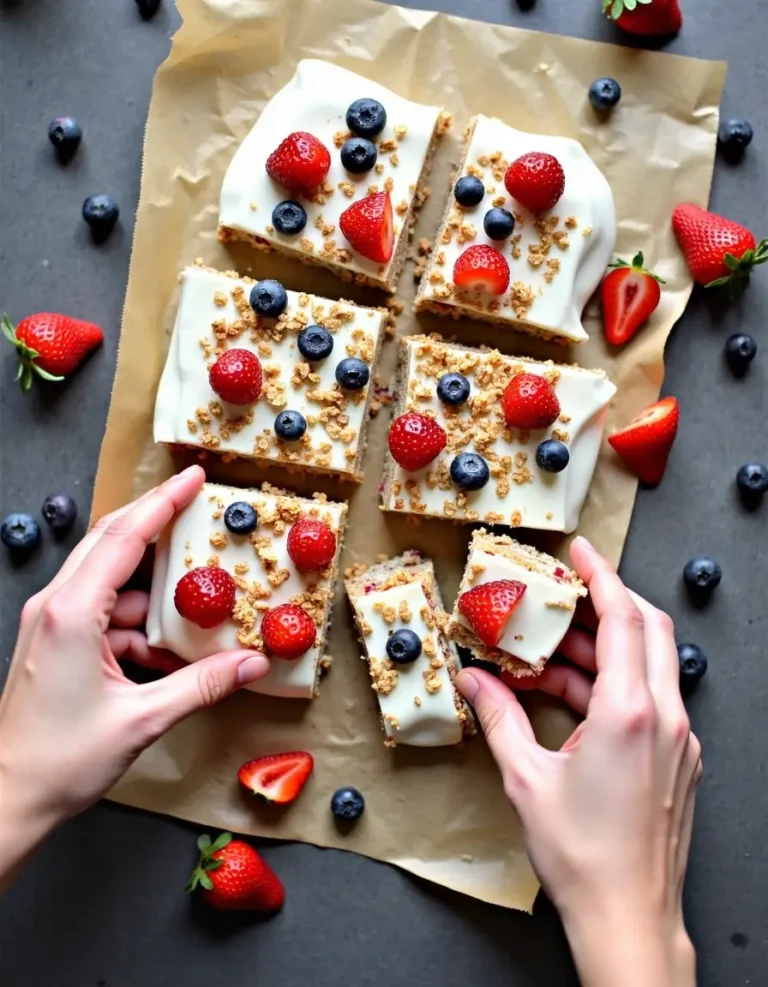
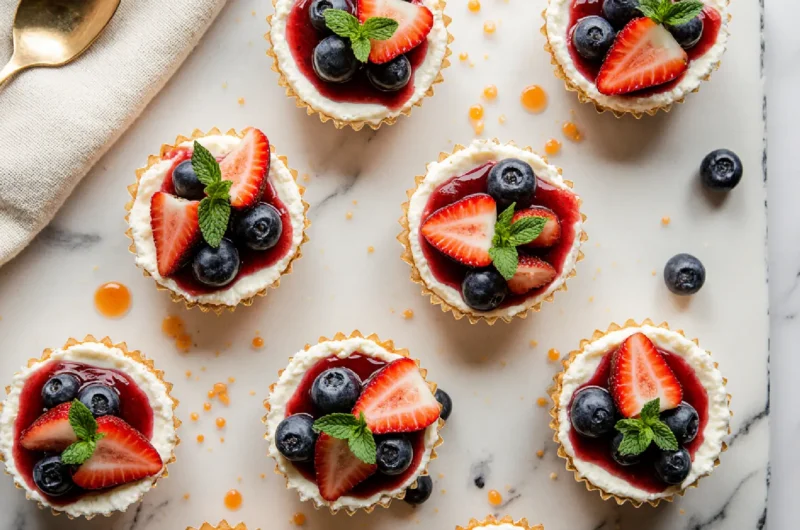
I often spoon a little strawberry compote on top—just fresh berries simmered with sugar until they’re jammy and bright. The contrast between the creamy cheesecake and the tart fruit is what we call perfetto. Fresh berries scattered on top add color and a burst of freshness.
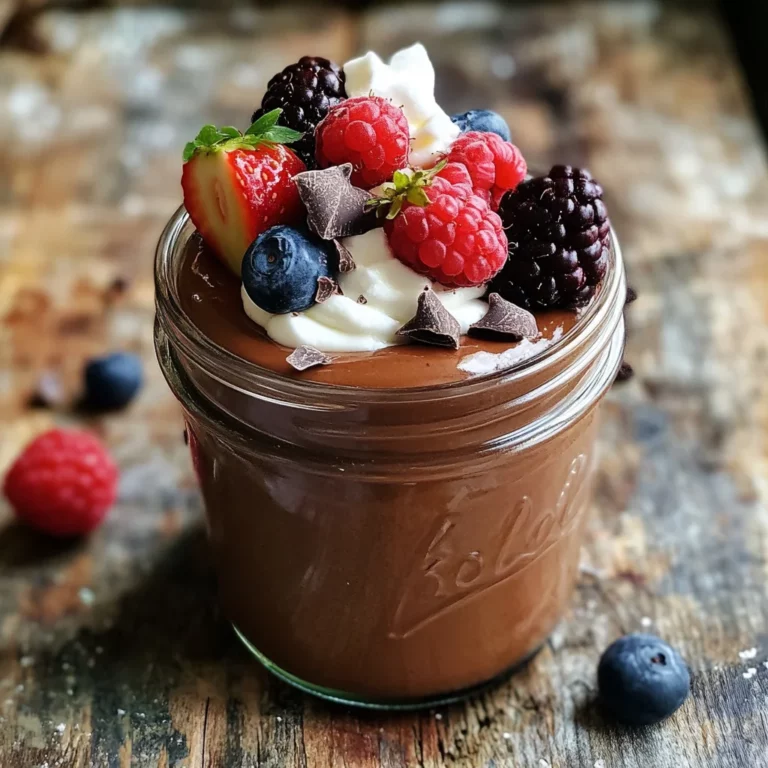
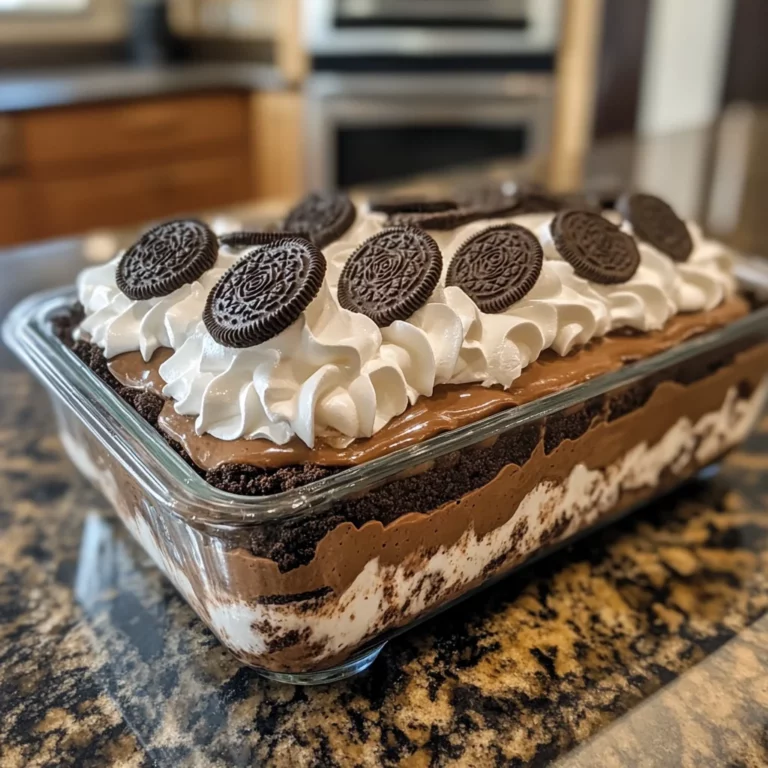
But maybe you’re a chocolate person. In that case, make a simple ganache by heating cream and pouring it over chopped dark chocolate. Let it sit for a minute, then stir until glossy. Spoon it over the chilled cheesecakes and return them to the fridge to set.
Lemon curd, salted caramel, a drizzle of honey with crushed pistachios, even a spoonful of your favorite jam—they all work. This is where you get to play, to experiment, to make these cheesecakes tell your story instead of mine.
🎨 Topping Flavor Matcher
Discover the perfect topping combination for your mini cheesecakes
Three Things That Make the Difference
After making these countless times, I’ve learned that three small things separate good cheesecakes from exceptional ones:
The Whipped Cream Cannot Be Negotiated. This is the backbone of the recipe. It’s what allows the filling to set without eggs or gelatin. Beat your cream cold, beat it until stiff, and fold it gently into the filling. Skip this or rush it, and you’ll have soup instead of cheesecake.
Full-Fat Cream Cheese in Brick Form Is Essential. I learned this the hard way after trying to use spreadable cream cheese from a tub. It has different moisture content and stabilizers that don’t allow the cheesecake to set properly. Look for the 8-ounce foil-wrapped bricks of full-fat cream cheese. They’re reliable, they’re consistent, and they’ll never let you down.
Refrigerate, Don’t Freeze. I know it’s tempting to pop these in the freezer to speed things up—trust me, I’ve been there, staring at my watch before guests arrive. But the freezer chills unevenly. The crust becomes rock-hard while the filling stays soft, and biting into frozen crust is nobody’s idea of a good time. Be patient. Let the refrigerator work its slow, steady magic.
Easy Mini No Bake Cheesecakes
Course: RecipesCuisine: AmericanDifficulty: Easy24
servings25
minutes3
hours300
kcalDiscover the easiest mini no bake cheesecakes recipe! Creamy, dreamy individual desserts that set in the fridge. No oven needed, easy to do!
Ingredients
- For the Graham Cracker Crust:
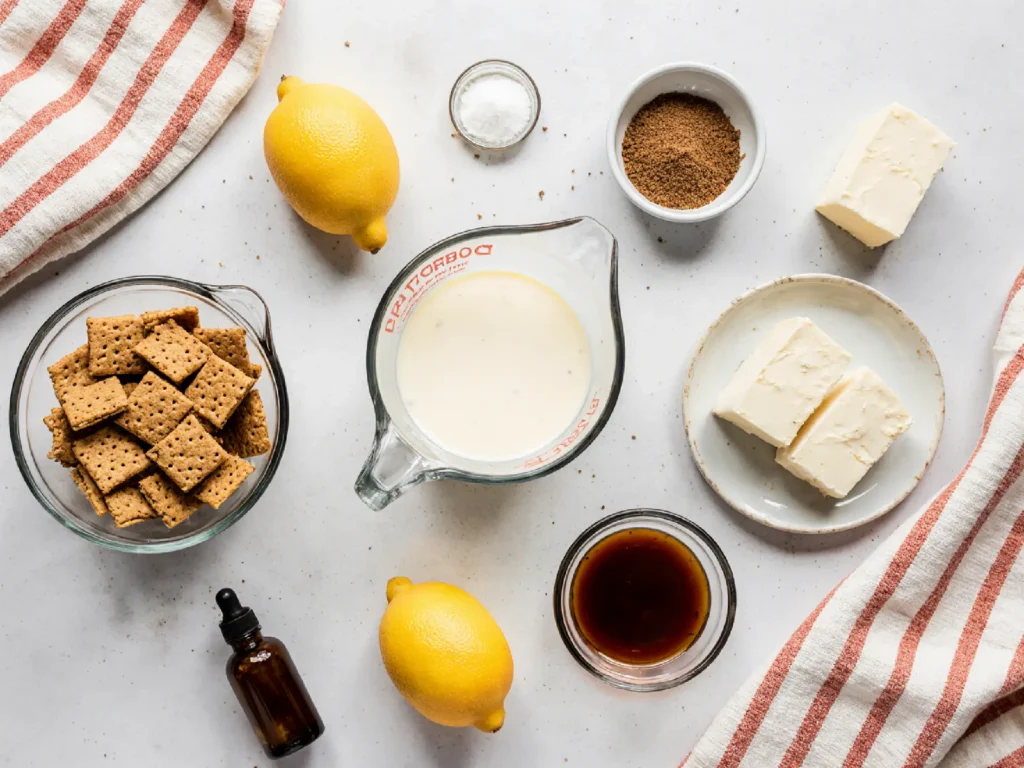
2 cups (240g) graham cracker crumbs (about 16 full sheet graham crackers)
1/3 cup (67g) packed light or dark brown sugar
1/2 cup (8 Tbsp; 113g) unsalted butter, melted
- For the Cheesecake Filling:
1 cup (240ml) cold heavy cream or heavy whipping cream
16 ounces (452g) full-fat brick cream cheese, softened to room temperature
1/3 cup (67g) granulated sugar
2 Tablespoons (30g) sour cream or plain yogurt, at room temperature
1 teaspoon fresh lemon juice
1/2 teaspoon pure vanilla extract
- Optional Toppings:
Fresh berries
Strawberry sauce or jam
Lemon curd
Chocolate ganache
Salted caramel
Directions
- Prepare Your Workspace: Line two standard 12-count muffin pans with cupcake liners. Make sure you have adequate space in your refrigerator for both pans to chill undisturbed.
- Build Your Crust: Pulse graham crackers in a food processor until they become fine crumbs, or crush them by hand in a sealed bag. Transfer to a medium bowl and combine with brown sugar and melted butter, stirring until the mixture resembles wet sand. Measure 1½ tablespoons of this mixture into each liner and press down firmly with the back of a spoon to create a compact base.
- Optional Crust Baking: For a sturdier crust, bake at 350°F (177°C) for 5 minutes. Allow to cool for 10 minutes before adding filling. If you prefer to skip this step, the crust will simply be more delicate.
- Create Your Whipped Cream: In a clean, dry bowl, beat cold heavy cream with an electric mixer on medium-high speed until stiff peaks form (approximately 3 minutes). The cream should stand up proudly when you lift the beaters. Set aside.
- Mix the Cream Cheese Base: In a separate bowl, beat room temperature cream cheese and granulated sugar together until completely smooth and creamy, scraping down the sides as needed. Add sour cream, lemon juice, and vanilla extract. Beat on medium-high speed until unified and silky, ensuring no lumps remain.
- Fold with Care: Using a silicone spatula or your mixer on low speed, gently fold the whipped cream into the cream cheese mixture. Cut down through the center, sweep along the bottom, and bring up the sides, rotating the bowl as you go. Continue until no white streaks remain, being careful not to deflate the airiness of the whipped cream.
- Assemble Your Cheesecakes: Transfer the filling to a piping bag fitted with a large tip (or use a spoon if you prefer). Pipe or spoon approximately 2 tablespoons of filling over each crust, smoothing the tops with the back of a spoon to create an even surface.
- The Waiting Game: Refrigerate the muffin pans for at least 3 hours or up to 2 days. Cover with plastic wrap or aluminum foil if chilling longer than 3 hours.
- Serve and Enjoy: Keep refrigerated until ready to serve. Add your chosen toppings just before serving. The cheesecakes will begin to soften after 30-60 minutes at room temperature, so remove liners shortly after taking them from the fridge.
Notes
- Room Temperature Matters: Cream cheese and sour cream must be at room temperature for a smooth filling. Cold ingredients will create lumps. However, heavy cream must be cold to whip properly.
- Cream Cheese Selection: Use 8-ounce bricks of full-fat cream cheese only. Low-fat varieties or tub spreads will not set properly.
- Lemon Juice Purpose: The small amount of lemon juice brightens flavors without making the cheesecake taste citrusy. For lemon-flavored cheesecakes, replace sour cream with an additional 2 tablespoons lemon juice and add 2 teaspoons lemon zest.
- Non-US Substitutions: If graham crackers aren’t available, use 2 cups (240g) ground digestive biscuits (about 16 biscuits) with the same amount of butter and slightly more sugar (about 1/2 cup or 100g).
Storage
Cover and refrigerate leftover mini cheesecakes for up to 5 days.
Make-Ahead & Freezing
These can be prepared 1-2 days in advance and kept refrigerated. To freeze: chill as directed, remove from muffin pans (keep liners on), arrange in a single layer in a freezer-safe container, cover tightly, and freeze for up to 3 months. Thaw in the refrigerator for at least 24 hours before serving.
A Final Thought
These easy mini No Bake cheesecakes represent everything I’ve come to love about cooking in America: they’re practical, forgiving, and designed for sharing. They don’t require fancy equipment or years of training. They simply ask for your attention, your willingness to follow a few key steps, and your excitement about feeding people something that tastes like celebration.
In my Tuscan kitchen, we would have called these piccoli tesori—little treasures. And that’s exactly what they are: tiny, portable portions of joy that you can make without stress and serve with pride.
Whether you’re hosting a crowd, bringing dessert to a friend, or simply want something sweet on a Wednesday evening, these mini cheesecakes are ready to rise to the occasion. Make them once, and I promise they’ll become part of your repertoire—a reliable friend you can call on whenever you need something impressive without the fuss.
So gather your ingredients, clear some space in your refrigerator, and let’s create something beautiful together.
For more recipes follow us on Facebook and Pinterest.
Did you try it?
There are no reviews yet. Be the first one to write one.