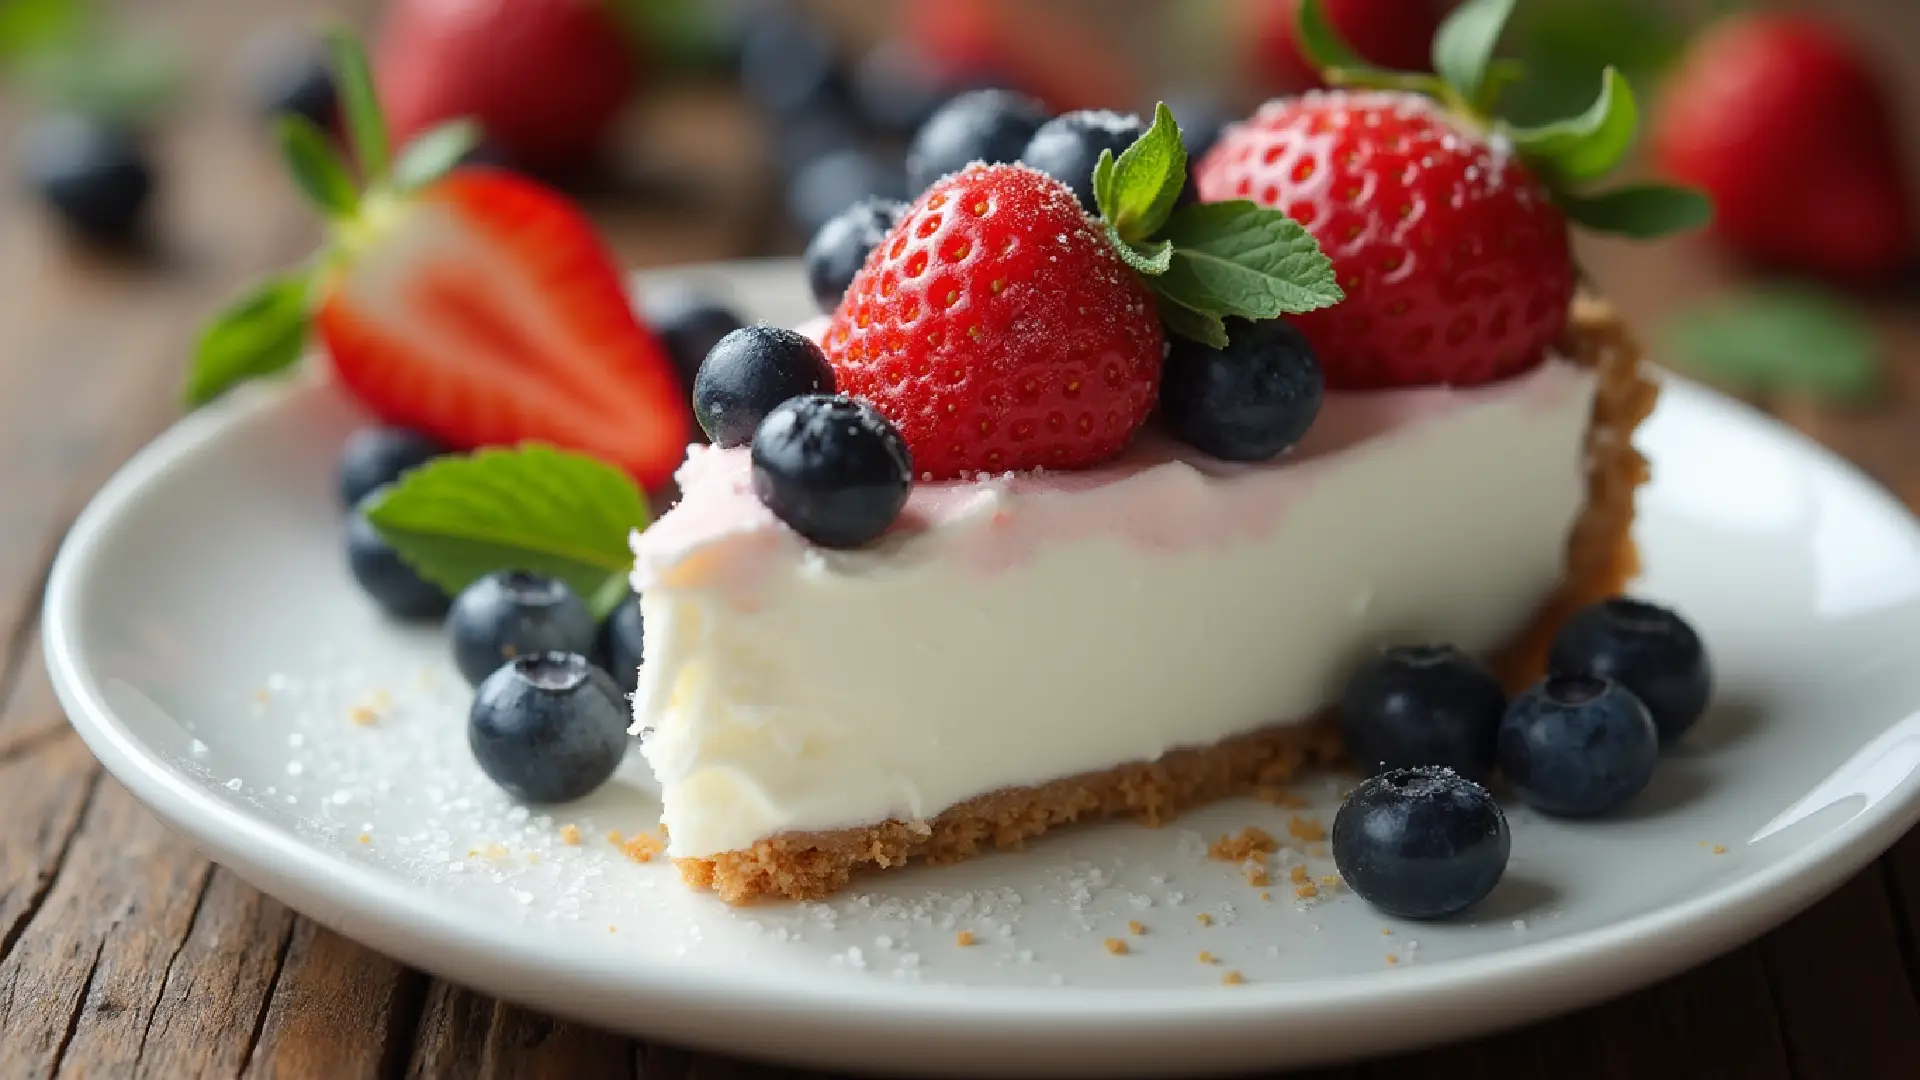
Easy No Bake Frozen Yogurt Pie with Fruit
I’ll be honest—the first time I made a frozen yogurt pie, it was a complete disaster. I was hosting Emma’s ninth birthday party, and my pie turned into a soupy, icy mess that never quite froze properly. The kids ended up eating it with spoons like soft-serve ice cream, which they loved, but it wasn’t exactly what I’d planned.
After testing this recipe seventeen times (yes, I counted), I finally cracked the code on what makes the perfect easy no bake frozen yogurt pie with fruit. Here’s the science behind it: frozen yogurt pie is essentially a type of semifreddo—an Italian term meaning “half-frozen.” The key is creating a stable emulsion between the whipped topping’s air bubbles and the yogurt’s proteins, which gives you that perfect creamy-but-frozen texture that’s softer than ice cream but firmer than mousse.
The genius of this no bake frozen yogurt pie is that it requires zero cooking, no ice cream maker, and comes together in about 20 minutes of active time. The whipped topping provides the air structure, the yogurt adds tang and creaminess, and the fruit gives bursts of flavor and texture. When frozen together, they create something that tastes like a fancy frozen dessert but takes almost no skill to pull off.
Jake calls this my “science experiment pie” because I always explain what’s happening as we make it together. The best part? You can customize it with whatever yogurt flavor and fruit combination you have on hand, making it the ultimate flexible summer dessert.
Why This Frozen Yogurt Pie Recipe Works
After years of testing (and plenty of failures), I’ve found that the secret to perfect no bake frozen yogurt pie lies in three critical factors:
Ratio of whipped topping to yogurt: The ideal ratio is approximately 1:1.25 by weight. Too much whipped topping and the pie tastes like frozen Cool Whip. Too much yogurt and it freezes rock-hard and icy. This balance creates that perfect semifreddo texture.
Folding technique: This is where most people go wrong. You must fold—not stir, not whip, not mix—the ingredients together. Folding preserves the air bubbles in the whipped topping while incorporating the yogurt. Aggressive mixing deflates those bubbles, and you end up with a dense, icy pie instead of a light, creamy one.
Freeze time and serving temperature: The pie needs a full 3 hours to set properly, but here’s the critical part most recipes don’t tell you: you need to let it sit at room temperature for 45-60 minutes before serving. This is non-negotiable. A pie straight from the freezer is too hard to cut and too cold to taste properly. That waiting period allows the texture to soften to perfection and the flavors to bloom.
Pro tip from my pastry days: Temperature matters more than you think. Your whipped topping should be just thawed—still cold but pliable. Your yogurt should be cold from the refrigerator. If either ingredient is too warm, the mixture won’t freeze properly and you’ll get ice crystals.
Ingredients for Easy No Bake Frozen Yogurt Pie
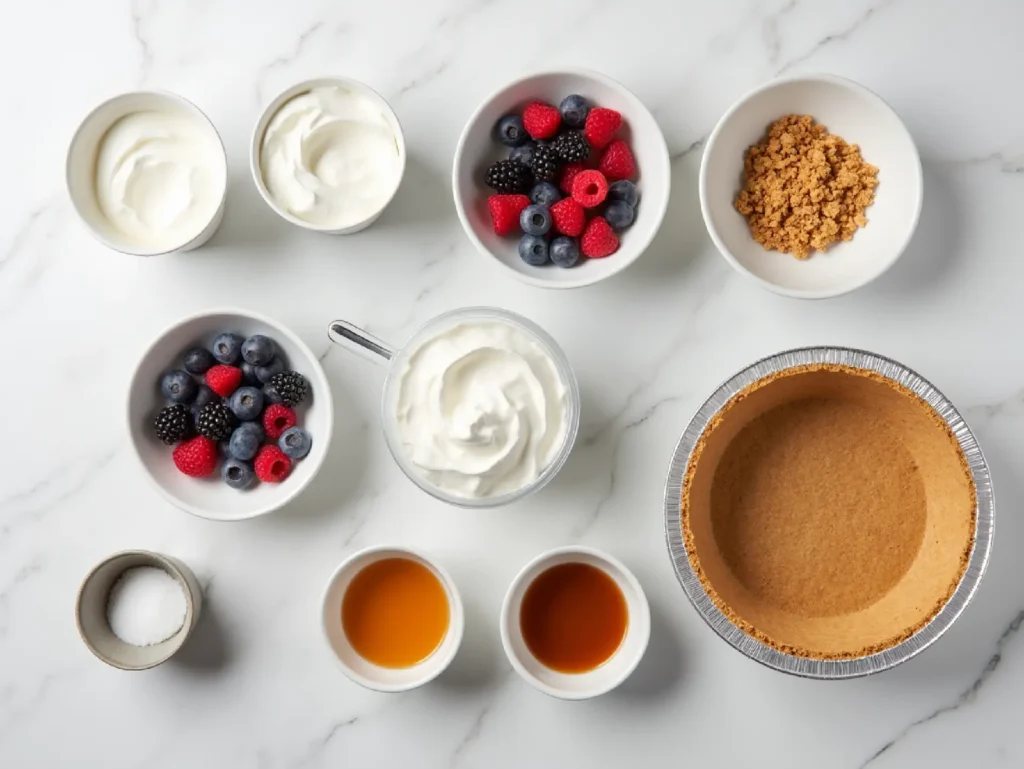
Here’s what you’ll need for this simple frozen yogurt pie. I’m breaking down not just what to use, but why each ingredient matters:
Core Ingredients
Frozen Whipped Topping (8 oz/227g): This is your structure provider. Cool Whip, Tru Whip, or So Delicious Coco Whip all work beautifully. The whipped topping should be thawed in the refrigerator for about 5 hours, or you can place the tub in a bowl of cold water for 30-40 minutes. It should be soft enough to fold but still cold—not melted or soupy. Regular, reduced-fat, or sugar-free varieties all work, though I prefer regular for the best texture. The stabilizers in commercial whipped topping are actually helpful here—they prevent the pie from becoming icy during freezing.
Yogurt (10-12 oz/283-340g): This provides the tangy flavor and creamy base. You can use regular yogurt, low-fat yogurt, or Greek yogurt—all work, but they create slightly different textures. Greek yogurt makes a denser, richer pie due to its higher protein content. Regular yogurt creates a lighter, more delicate texture. The yogurt flavor you choose determines your pie’s personality—vanilla is classic and versatile, strawberry is sweet and fruity, lemon is bright and refreshing. In my testing, I found that 10 ounces creates a lighter pie, while 12 ounces makes it richer and tangier.
Chopped Fruit (1 cup/150g): This adds texture, sweetness, and visual appeal. Fresh or frozen fruit both work beautifully. If using frozen fruit, don’t thaw it completely—you want it slightly frozen so it doesn’t release too much liquid into your mixture. Popular options include strawberries, blueberries, raspberries, peaches, mangoes, or bananas. I like to cut fruit into small pieces (about ½-inch) so you get fruit in every bite without overwhelming chunks. The fruit you choose should complement your yogurt flavor—strawberries with vanilla, blueberries with lemon, mangoes with coconut.
Pre-made Pie Crust (6 oz): The foundation of your pie. Graham cracker crust is the classic choice and pairs beautifully with virtually any flavor combination. Chocolate cookie crust works wonderfully with chocolate or vanilla yogurt. I always use store-bought crusts for this recipe because the no-bake nature means you’re not getting any advantage from homemade. Save yourself the time and effort.
Optional Garnishes: Fresh berries, mint leaves, whipped cream, or a drizzle of fruit sauce make the pie look bakery-worthy. I add these right before serving, never before freezing.
Optional Mix-ins and Variations
- Mini chocolate chips: Add ½ cup for chocolate-studded bites
- Chopped nuts: Walnuts or pecans add crunch (½ cup)
- Shredded coconut: Perfect with tropical fruit (⅓ cup)
- Lemon or orange zest: Adds brightness (1-2 teaspoons)
- Cream cheese: Whip 4-8 oz of softened cream cheese with the yogurt for a cheesecake-like flavor
Tools You’ll Need
I’m particular about tools because the right equipment makes this recipe foolproof:
Large mixing bowls (at least 2): You need one for folding together the whipped topping and yogurt, and it should be large enough that you can fold without ingredients spilling over the sides. I use my 4-quart stainless steel bowl.
Rubber spatula: This is your most important tool. A flexible rubber spatula allows you to fold properly—scooping from the bottom and bringing it over the top in gentle motions. Don’t use a spoon or whisk.
Measuring cups and spoons: For accurate measurements. While this recipe is forgiving, wildly different proportions will affect the final texture.
Plastic wrap or aluminum foil: To cover the pie during freezing. This prevents freezer burn and keeps your pie from absorbing odors from other foods in the freezer.
Sharp knife: For cutting clean slices when serving. I run mine under hot water and wipe it between cuts for the neatest presentation.
How to Make Easy No Bake Frozen Yogurt Pie with Fruit
After testing this recipe seventeen times, I can tell you exactly where things go wrong and how to avoid those pitfalls. Follow these steps precisely:
Step 1: Thaw Your Whipped Topping (5 hours or 30-40 minutes)
Before you do anything else, you need to thaw your frozen whipped topping. I prefer the refrigerator method—just move it from freezer to fridge 5 hours before you plan to make the pie. If you’re in a hurry, place the sealed container in a bowl of cold water for 30-40 minutes, changing the water once if it gets warm.
Why this matters: Frozen whipped topping can’t be folded—it’s too stiff. Melted whipped topping has lost its air structure. You need that perfect just-thawed state where it’s soft and pliable but still holds its shape.
Step 2: Fold Together Whipped Topping and Yogurt (3-4 minutes)
In a large bowl, combine the whipped topping and yogurt. Here’s the critical technique: use your rubber spatula to cut down through the center of the mixture, scrape along the bottom of the bowl, and bring the spatula up along the side, folding the mixture over on itself. Rotate the bowl a quarter turn and repeat. Continue this motion gently until the mixture is uniformly combined—you shouldn’t see distinct streaks of white and yogurt color.
The science: This folding motion preserves the air bubbles in the whipped topping while evenly distributing the yogurt. If you stir or mix aggressively, you’ll deflate those bubbles, and your pie will freeze dense and icy instead of light and creamy. The mixture should look billowy and light, not dense or liquid.
Temperature check: Both ingredients should be cold but not frozen. If your bowl feels warm to the touch, chill the mixture for 10 minutes before proceeding.
Step 3: Fold in Fruit (1-2 minutes)
Once your whipped topping and yogurt are blended, add your chopped fruit. Use the same gentle folding technique to incorporate the fruit evenly throughout the mixture. Don’t overmix—you want the fruit distributed but you’re not trying to break it down.
Pro tip: If you’re using very juicy fruit like strawberries or peaches, pat them dry with paper towels first. Excess liquid can create ice crystals in your finished pie.
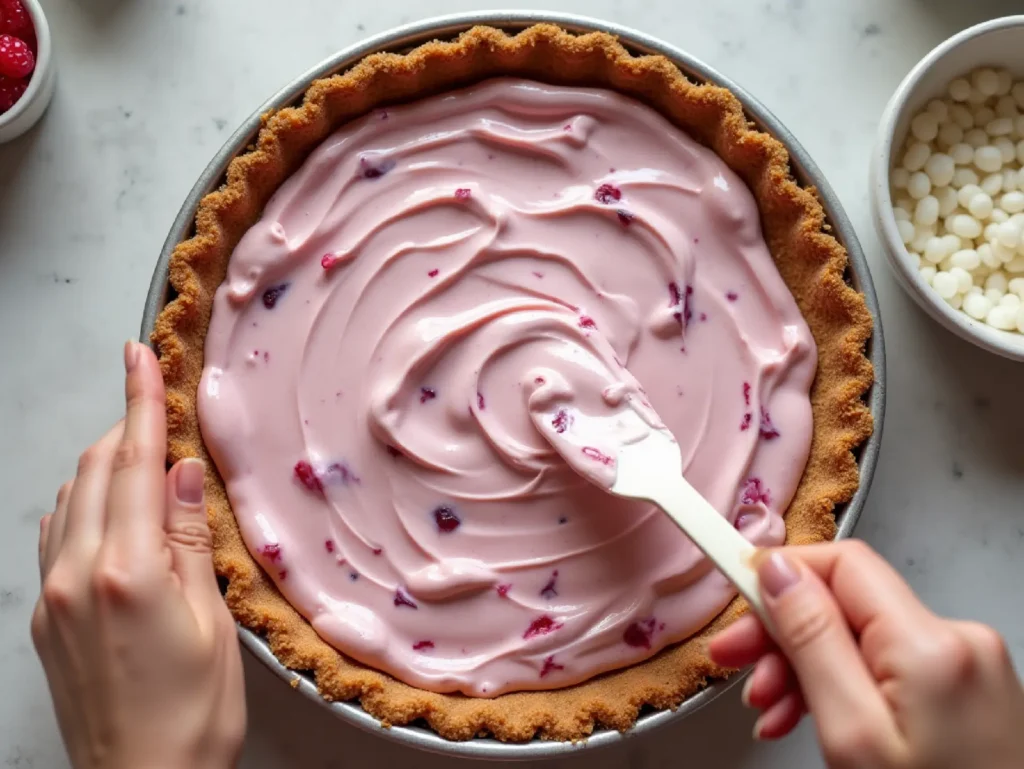
Step 4: Fill the Pie Crust (2 minutes)
Pour the yogurt mixture into your pre-made pie crust. Use your rubber spatula to spread it evenly to all edges. Here’s a technique I learned in pastry school: use the back of a spoon to create gentle waves or swirls on top. This isn’t just aesthetic—it helps the pie freeze more evenly because there are no thick spots or air pockets.
Make sure you fill all the way to the edges and don’t leave gaps between the filling and crust. Those gaps will create air pockets that freeze into ice crystals.
Step 5: Cover and Freeze (3 hours minimum)
Cover your pie with plastic wrap or aluminum foil. Make sure the covering doesn’t touch the surface of the pie—if it does, it’ll pull the filling when you remove it. I usually tent the foil slightly or press the plastic wrap onto the filling surface very gently.
Place in the freezer on a flat surface where it won’t be disturbed. Freeze for at least 3 hours. In my testing, pies frozen for less than 3 hours were too soft to cut. For the best texture, I actually recommend 4 hours or overnight.
Here’s the science behind it: The freezing process needs time to crystallize the water content gradually. Fast freezing at extremely cold temperatures creates smaller ice crystals (which is good), but this pie needs time for the emulsion to stabilize. The proteins in the yogurt and the fats in the whipped topping need to solidify around those air bubbles you’ve preserved.
Step 6: Thaw Before Serving (45-60 minutes)
This is the step most people skip, and it’s the difference between an okay pie and an amazing one. Remove the pie from the freezer and let it sit at room temperature for 45-60 minutes before serving.
Why this is crucial: Straight from the freezer, the pie is too hard to cut cleanly, and it’s so cold that your taste buds can’t detect the subtle flavors. That 45-60 minute window allows the texture to soften to the perfect creamy consistency—somewhere between ice cream and mousse. The flavors also become much more pronounced.
Temperature note: If your kitchen is very warm (above 75°F), start checking at 30 minutes. If it’s cool (below 65°F), you might need a full 60-75 minutes.
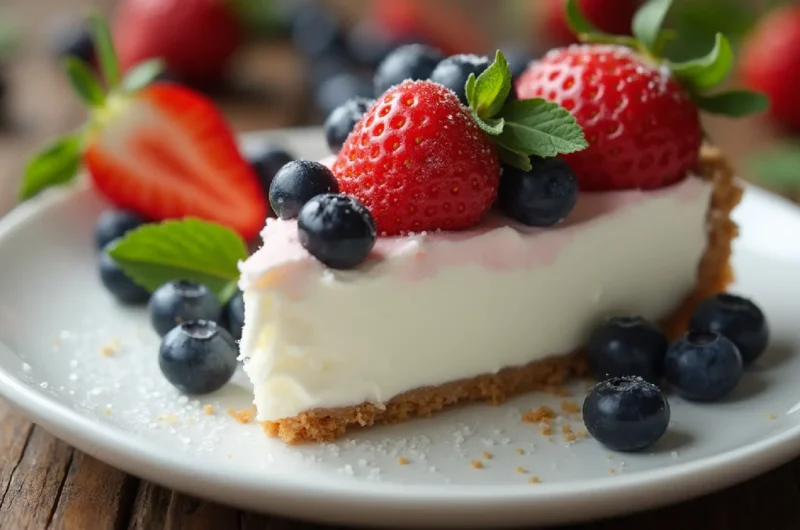
Step 7: Garnish and Serve (2 minutes)
Right before serving, add any garnishes you’d like—fresh berries, mint leaves, a drizzle of chocolate or caramel sauce, extra whipped cream. Cut with a sharp knife, wiping it clean between slices for neat edges.
Emma’s presentation tip: My daughter taught me to arrange fresh berries in a decorative pattern on top. It takes 2 minutes and makes the pie look like it came from a bakery.
🥧 Frozen Yogurt Pie Calculator
Planning a party or making multiple pies? Calculate exactly how much you need!
📋 Ingredients You’ll Need:
Pro Tips for Perfect Frozen Yogurt Pie
After years of making this recipe, here are the insights that separate good frozen yogurt pie from great frozen yogurt pie:
Texture Troubleshooting
Too icy? This usually happens when: (1) You mixed too vigorously and deflated the whipped topping, (2) Your ingredients were too warm when you combined them, or (3) You used too much yogurt relative to whipped topping. The solution is to be gentler next time and ensure everything is properly chilled.
Too soft, won’t hold shape? You probably didn’t freeze it long enough, or you let it sit out too long before serving. Pop it back in the freezer for 30 minutes.
Dense and heavy? You deflated the whipped topping by stirring instead of folding. Remember—fold gently, don’t mix aggressively.
Separated or weeping? This happens when fruit releases too much liquid. Next time, pat fruit dry before adding, or use slightly less juicy fruits.
Flavor Combinations I’ve Tested
After seventeen batches, here are my favorite tested combinations:
Strawberry Fields: Vanilla yogurt + fresh strawberries + graham cracker crust. Classic and crowd-pleasing.
Lemon Blueberry: Lemon yogurt + blueberries + splash of lemon zest + graham cracker crust. My personal favorite—bright and refreshing.
Tropical Paradise: Coconut yogurt + mangoes and pineapple + shredded coconut + graham cracker crust. Jake’s favorite for summer.
Peach Melba: Vanilla yogurt + peaches and raspberries + graham cracker crust. Elegant and sophisticated.
Chocolate Berry: Chocolate yogurt + raspberries + chocolate cookie crust + mini chocolate chips. Decadent.
Banana Cream: Vanilla yogurt + sliced bananas + graham cracker crust + sprinkle of cinnamon. Tastes like banana cream pie.
Mixed Berry: Mixed berry yogurt + strawberries, blueberries, and raspberries + graham cracker crust. Emma’s favorite—she calls it “rainbow pie.”
Make-Ahead and Serving Strategy
This is one of my favorite make-ahead desserts because it actually needs to be made in advance:
Ideal timeline: Make the pie 1 day ahead. It gives the flavors time to meld, and it’s one less thing to worry about on party day.
Maximum advance: You can make this up to 3 days ahead. Beyond that, ice crystals start to form and the texture deteriorates slightly.
Party tip: If serving at a gathering, remove from freezer 60 minutes before you plan to serve dessert. This timing is pretty forgiving—anywhere from 45-75 minutes works.
Customizing for Dietary Needs
My husband’s diabetes has made me good at adapting recipes:
Lower sugar: Use sugar-free whipped topping and sugar-free yogurt. The pie will be slightly less sweet but still delicious. You might want to add a little vanilla extract or almond extract to boost flavor.
Dairy-free/Vegan: Use coconut-based whipped topping (So Delicious makes a good one) and coconut or almond milk yogurt. Ensure your crust is vegan (check ingredients for butter or milk). The texture is slightly different—a bit icier—but still very good.
Lower calorie: Use fat-free whipped topping and non-fat Greek yogurt. It won’t be quite as creamy, but it’s still enjoyable and significantly lighter.
Gluten-free: Just ensure your crust is gluten-free (many chocolate cookie crusts contain wheat, so check labels).
Storage and Freezer Tips
Proper storage keeps your frozen yogurt pie perfect:
Freezer storage: Keep covered tightly with plastic wrap or in an airtight container for up to 1-2 weeks. I always label mine with the date and flavor.
Preventing freezer burn: The key is airtight covering. I press plastic wrap directly onto any cut surfaces, then wrap the whole pie in foil. This two-layer method works perfectly.
Freezing individual slices: Cut the pie into slices, wrap each slice individually in plastic wrap, then store in a freezer bag. This lets you thaw just what you need. Great for portion control or quick desserts.
Refreezing: I don’t recommend refreezing after the pie has fully thawed. The texture changes significantly—it becomes icy and grainy. If you have leftovers after serving, they’ll keep in the fridge for 1-2 days but won’t refreeze well.
Thawing properly: Always thaw in the refrigerator if you’re not serving immediately. A pie thawed on the counter at room temperature can develop a watery layer.
Easy No Bake Frozen Yogurt Pie with Fruit
Course: RecipesCuisine: AmericanDifficulty: Easy8
servings20
minutes3
hours177
kcalCreamy no bake frozen yogurt pie with fruit ready in 20 minutes! Simple 4-ingredient recipe, endlessly customizable. Perfect make-ahead summer dessert.
Ingredients
8 oz frozen whipped topping, thawed (such as Cool Whip, Tru Whip, or So Delicious)
10-12 oz yogurt (regular, Greek, or low-fat), cold from refrigerator
1 cup chopped fruit (fresh or frozen), matching your yogurt flavor
1 (6 oz) pre-made graham cracker or chocolate cookie pie crust
Optional garnish: fresh berries and mint leaves
Directions
- Thaw whipped topping: If using frozen whipped topping, thaw in refrigerator for 5 hours or place container in bowl of cold water for 30-40 minutes. It should be soft and pliable but still cold.
- Fold together base: In a large bowl, combine whipped topping and yogurt. Using a rubber spatula, gently fold together using a cutting and lifting motion. Cut down through center, scrape along bottom, bring up the side, and fold over. Rotate bowl and repeat until uniformly blended with no streaks remaining, 3-4 minutes. Do not stir or mix vigorously.
- Add fruit: Add chopped fruit to the mixture. Gently fold to distribute evenly throughout, about 1-2 minutes. If using very juicy fruit, pat dry with paper towels first.
- Fill crust: Pour mixture into pre-made pie crust. Use rubber spatula to spread evenly to all edges. Smooth top with back of spoon, creating gentle swirls or waves.
- Freeze: Cover pie with plastic wrap or aluminum foil, ensuring covering doesn’t touch the filling surface. Place in freezer on flat surface for at least 3 hours, or until firm. For best texture, freeze 4 hours or overnight.
- Soften before serving: Remove pie from freezer 45-60 minutes before serving. Let sit at room temperature until softened to perfect creamy texture. This step is crucial—don’t skip it!
- Garnish and serve: Add optional fresh berry and mint garnish right before serving. Cut with sharp knife, wiping blade clean between slices for neat cuts.
Notes
- Folding technique is crucial: Gentle folding preserves air bubbles in whipped topping, creating a creamy texture instead of icy. Never stir or mix vigorously.
- Temperature matters: All ingredients should be cold but not frozen. Whipped topping should be just thawed—soft but still cold.
- Freezing time: Minimum 3 hours, but 4 hours or overnight is ideal. Under-frozen pie is too soft to cut.
- Softening time is non-negotiable: 45-60 minutes at room temperature allows texture to perfect and flavors to bloom. Adjust timing based on room temperature.
- Fruit choices: Match fruit to yogurt flavor. Strawberries with vanilla, blueberries with lemon, peaches with vanilla, etc. Chop fruit into small pieces (½-inch).
- Storage: Cover tightly and store in freezer for up to 1-2 weeks. Cut slices can be wrapped individually and frozen.
- Make ahead: Best made 1 day in advance. Can be made up to 3 days ahead.
Nutrition (per slice)
Calories: 177 kcal | Carbohydrates: 24g | Protein: 3g | Fat: 8g | Saturated Fat: 3g | Sodium: 138mg | Fiber: 1g | Sugar: 11g | Calcium: 85mg
❓ Frequently Asked Questions
Everything you need to know about making the perfect frozen yogurt pie
Yes, but with caveats. Make your own stabilized whipped cream: beat 1½ cups heavy cream with ¼ cup powdered sugar and ½ teaspoon vanilla until stiff peaks form. The key word is “stiff”—it needs to be stable enough to hold up during freezing.
Fresh whipped cream creates a slightly icier texture than Cool Whip because it lacks the stabilizers, but many people prefer the taste. In my testing, homemade whipped cream pies are best served within 2-3 days, while Cool Whip versions last longer.
The most common causes are:
(1) You mixed too aggressively and deflated the air bubbles in the whipped topping—remember to fold gently.
(2) Your ingredients were too warm when combined—everything should be cold.
(3) You used too much yogurt relative to whipped topping, or used a very watery yogurt. Greek yogurt’s thickness actually helps prevent iciness.
(4) Your freezer is too cold. Paradoxically, extremely cold freezers (below 0°F) can create larger ice crystals.
Absolutely! Frozen fruit often works better than fresh because it’s usually picked at peak ripeness. Don’t thaw the fruit completely—use it slightly frozen so it doesn’t release too much liquid.
If you fully thaw frozen fruit and it’s sitting in a puddle of juice, drain that liquid before adding to your mixture. In my testing, frozen berries worked particularly well because they stayed firm and didn’t get mushy.
I recommend making it 1 day ahead for the best texture and flavor. You can make it up to 3 days in advance, but beyond that, ice crystals start to form and the texture becomes slightly grainy. The flavors also start to fade after a few days.
For parties, I make it the night before—it’s perfect by serving time.
You either didn’t freeze it long enough (needs minimum 3 hours), or you let it sit out too long before serving. If it’s too soft, just pop it back in the freezer for 20-30 minutes.
Also check that your freezer is actually working properly—it should be at 0°F or below. If you’re making the pie during a hot summer day and your kitchen is very warm, the mixture might have gotten too warm before freezing, which affects the final texture.
Yes! Pour the mixture into a springform pan lined with parchment paper. You’ll have something closer to a frozen yogurt “cake” or semifreddo. Slice and serve on plates. It’s actually quite elegant this way.
You can also make individual servings in small bowls or cups—just adjust the freezing time (smaller portions freeze faster, so check at 2 hours).
In my testing, virtually any yogurt flavor works. Vanilla is the most versatile. Fruit flavors (strawberry, blueberry, peach, raspberry) create a more intense, fruit-forward pie. Lemon and key lime are wonderfully bright and tangy. Chocolate makes a decadent dessert-style pie.
Even plain yogurt works—you can sweeten it with 2-3 tablespoons of honey or sugar if desired. Greek yogurt creates a tangier, denser pie, while regular yogurt is lighter and more delicate.
This is more common with heavier fruits like bananas or canned fruit. Solutions:
(1) Chop fruit smaller—smaller pieces suspend better.
(2) Freeze the mixture for 30 minutes until it starts to set, then stir in the fruit.
(3) Toss fruit in a tiny bit of powdered sugar, which helps it adhere to the mixture.
In my testing, berries rarely sink because they’re naturally lighter.
Yes! Use a muffin tin lined with cupcake liners or small graham cracker crust shells. Fill each about ¾ full (the mixture expands slightly when frozen). Freeze for 2 hours instead of 3.
These are perfect for portion control or individual servings at parties. Kids love them because they feel like getting their own personal dessert.
Yes! Use coconut-based whipped topping (So Delicious makes a good one) and coconut or almond milk yogurt. Ensure your crust is vegan (check ingredients for butter or milk).
The texture is slightly different—a bit icier—but still very good. Make sure all your substitutes are cold before mixing.
The Kitchen Laboratory Verdict
After all my testing, this easy no bake frozen yogurt pie with fruit has become my go-to summer dessert. It’s the recipe I turn to when I need something impressive but don’t want to turn on the oven, when Emma and Jake want to help in the kitchen (no hot surfaces or complicated techniques), or when I need a make-ahead dessert that looks bakery-worthy.
The beauty of this recipe is its flexibility and reliability. You can adapt it to whatever fruit is in season, whatever yogurt flavor sounds good, and whatever dietary needs you’re accommodating. The basic technique stays the same: fold gently, freeze thoroughly, and let it soften before serving.
My husband appreciates that I can make a lower-sugar version that still satisfies his sweet tooth. The kids love choosing the fruit combinations—we’ve tried at least twenty different variations at this point. And I love it because it’s one of those recipes that makes me look like a kitchen genius with minimal effort.
The key to success is understanding the science: you’re creating a stable emulsion of air (from whipped topping), protein (from yogurt), and fat (from both), which freezes into that perfect semifreddo texture—creamy, not icy, and absolutely delicious. Get the folding technique right, freeze it long enough, and let it soften before serving. Those three things are non-negotiable.
One final note: This pie tastes best at that perfect temperature between frozen-solid and fully-softened—what I call the “semifreddo zone.” That’s why the 45-60 minute rest at room temperature is crucial. Trust the process, and you’ll have the perfect frozen yogurt pie every single time.
For more recipes follow us on Facebook and Pinterest.
Did you try it?
There are no reviews yet. Be the first one to write one.