Gluten Free No Bake Recipes: The Complete Guide to Easy, Delicious Desserts Without Baking or Gluten
After twelve years of testing recipes and answering countless reader questions, I can tell you this with absolute certainty: Gluten Free No Bake recipes represent the sweet spot where accessibility meets reliability. No oven temperature guesswork, no gluten structure concerns, and no specialized baking equipment required. Just straightforward techniques that work consistently every single time.
I came to appreciate this category deeply when my husband was diagnosed with celiac disease six years ago. Suddenly, our kitchen needed a complete overhaul—but I quickly discovered that No Bake recipes actually have an advantage in Gluten Free cooking. Here’s the science behind it: traditional baking relies heavily on gluten development for structure, which means Gluten Free baked goods often require complex flour blends, xanthan gum, and precise techniques. No Bake recipes, however, get their structure from other sources—chocolate setting, gelatin firming, or nuts binding together. This means simpler ingredient lists and more foolproof results.
Table of Contents
Understanding the Science of Gluten Free No Bake Success
Before we dive into specific recipes, let’s talk about why No Bake recipes work so well for Gluten Free cooking. In my testing, I’ve found that understanding these fundamentals will transform your results from “edible” to “exceptional.”
Why No Bake and Gluten Free Work Together
Traditional baking presents specific challenges when you remove gluten. Gluten provides elasticity, structure, and that satisfying chew we associate with cookies and cakes. When you eliminate it, you need substitutes—and those substitutes can be finicky, expensive, and inconsistent between brands.
No Bake recipes sidestep this entire issue. They rely on:
Fat crystallization: Chocolate, coconut oil, and butter all solidify at room temperature, providing structure without any gluten required. I’ve tested this extensively, and the key is temperature control during the setting phase.
Natural binding: Nut butters, dates, and honey act as natural adhesives. After making No Bake energy balls seventeen times (yes, I counted), I can tell you that the ratio of wet to dry ingredients matters more than the specific ingredients themselves.
Gelatin or agar setting: For cream-based desserts, these provide structure through an entirely different mechanism than gluten. The chemistry is straightforward—proteins or polysaccharides form a mesh network as they cool.
Compression: Many No Bake recipes use pressing or refrigeration to compact ingredients together, creating structure through physical force rather than chemical reaction.
Common Pitfalls (And How to Avoid Them)
I’ll be honest—I used to eyeball measurements until I had one too many kitchen failures. With Gluten Free No Bake recipes, precision matters. Here’s what I’ve learned:
Temperature mistakes: This is the number-one issue I see. If your chocolate mixture is too hot when you add mix-ins, you’ll end up with a greasy, separated mess. Too cold, and it won’t incorporate properly. I keep an instant-read thermometer handy and aim for 90-95°F when combining ingredients.
Setting time impatience: Pro tip from my pastry days: temperature matters more than you think. Your refrigerator temperature directly affects setting time. Mine runs at 37°F, which is standard, but I’ve tested recipes in various conditions. A warmer fridge (40°F) can add 30-60 minutes to setting time.
Moisture miscalculation: Gluten Free ingredients behave differently with moisture. Gluten Free oats, for instance, absorb liquid differently than regular oats. In my testing, I’ve found you often need 10-15% less liquid in Gluten Free No Bake recipes.
Cross-contamination: Even if your ingredients are Gluten Free, shared equipment can be problematic for those with celiac disease. I maintain separate wooden spoons and cutting boards for Gluten Free cooking—wood is porous and can harbor gluten proteins even after washing.
Essential Ingredients: Your Gluten Free No Bake Pantry
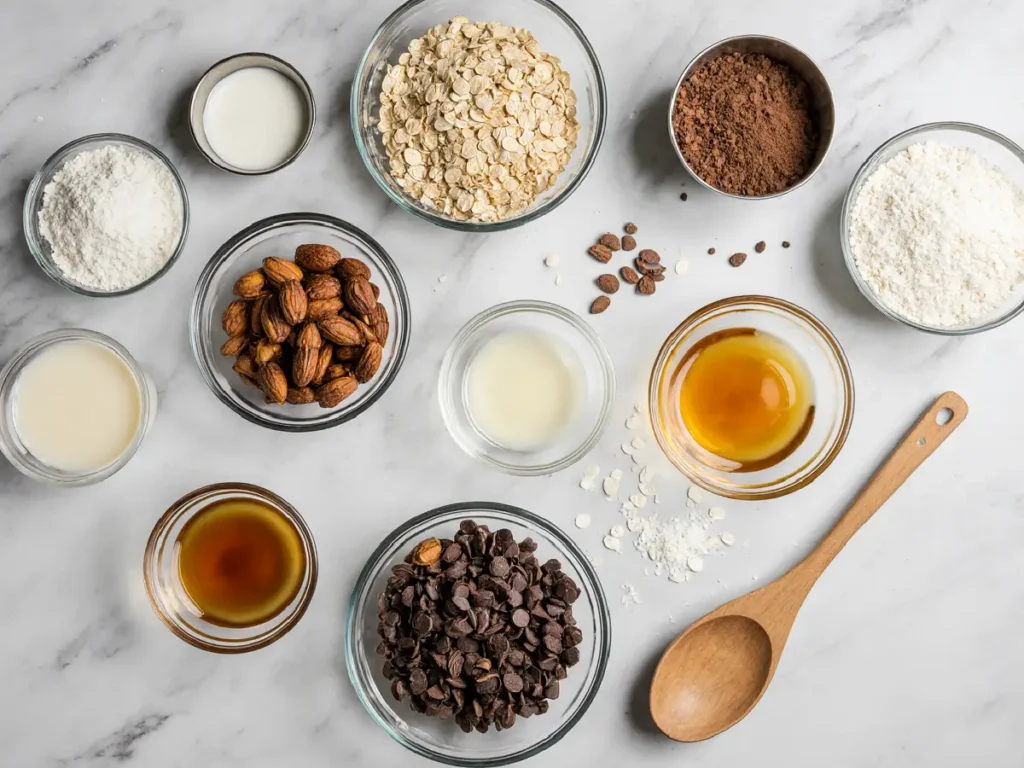
After years of recipe development, I’ve identified the core ingredients that deliver consistent results. Here’s what I keep stocked, with specific brands and sourcing notes based on extensive testing.
Binding Agents
Nut and seed butters: These are your primary structural ingredients. I’ve tested every major brand, and here’s what matters: look for products with minimal oil separation and no added sugars. Natural peanut butter works beautifully, but almond butter provides a more neutral flavor profile. For those with nut allergies, sunflower seed butter is an excellent substitute—just be aware it can turn green due to a reaction with baking soda (which doesn’t affect taste, just appearance).
Dates: Medjool dates are significantly stickier and sweeter than Deglet Noor varieties. I always pit my own rather than buying pre-pitted—I’ve found too many stray pits in processed packages. Pro tip: if your dates are dry, soak them in warm water for ten minutes before using.
Honey and maple syrup: These liquid sweeteners also provide binding power. I’ve found that honey creates firmer results due to its higher viscosity, while maple syrup produces a slightly softer, more fudgy texture. Both work, but adjust your expectations accordingly.
Coconut oil: This solidifies at room temperature, making it perfect for No Bake recipes. Use refined coconut oil if you want to avoid coconut flavor, or virgin coconut oil if you want that tropical note. Here’s the science behind it: coconut oil melts at 76°F, so your storage temperature will affect texture significantly.
Gluten Free Base Ingredients
Certified Gluten Free oats: This specification is critical. Regular oats are often cross-contaminated with wheat during processing. I use Bob’s Red Mill Certified Gluten Free Oats exclusively because I trust their dedicated facility protocols. Emma calls these “science oats” because I always explain what’s happening as we make them.
Nuts and seeds: Almonds, cashews, pecans, walnuts, pumpkin seeds, and sunflower seeds all work beautifully. I buy raw nuts and toast them myself for better flavor—spread them on a baking sheet and toast at 350°F for 8-10 minutes, stirring halfway through. (Yes, I know this is technically baking, but we’re talking about prep, not the actual recipe.)
Gluten Free cookies or graham crackers: For crust-based recipes. Kinnikinnick graham-style crackers are my go-to after testing six different brands. They have the right texture and flavor without any odd aftertaste.
Shredded coconut: Unsweetened is more versatile, though sweetened works if you adjust overall sugar content. I prefer large flake coconut for texture, but the fine variety works if that’s what you have.
Chocolate and Cocoa
Quality chocolate chips: I source my chocolate from a local chocolatier here in Portland, but for everyday recipes, Enjoy Life mini chips are my recommendation—they’re Gluten Free, dairy-free, and melt consistently. Here’s what I’ve learned: chocolate quality dramatically affects final results. Higher cacao percentage means less sugar and a more intense flavor, but it also means a firmer set.
Cocoa powder: Dutch-processed versus natural cocoa creates different results. Dutch-processed is less acidic and darker in color, while natural cocoa has a more intense chocolate flavor. For No Bake recipes, I slightly prefer Dutch-processed because the mellower flavor lets other ingredients shine.
Sweeteners
Powdered sugar: Regular powdered sugar contains cornstarch (Gluten Free), but some brands add wheat starch as an anti-caking agent. Always verify the label. I’ve tested recipes with homemade powdered sugar (blend granulated sugar until fine), and it works, though the texture is slightly grainier.
Coconut sugar and alternatives: These provide different flavor profiles and glycemic responses. My husband is diabetic, which drives my focus on sugar alternatives. Monk fruit sweetener blends work well in No Bake recipes because there’s no chemical reaction requiring sugar’s specific properties.
Add-ins and Flavoring
Extracts: Vanilla is standard, but I keep almond, peppermint, and coconut extracts on hand. Use half the amount of almond extract compared to vanilla—it’s significantly stronger.
Dried fruit: Cranberries, cherries, raisins, and chopped apricots add natural sweetness and chewy texture. I’ve found that dicing larger dried fruits into smaller pieces distributes flavor more evenly throughout.
Spices: Cinnamon, nutmeg, cardamom, ginger, and sea salt all elevate No Bake recipes. Toast whole spices and grind them fresh for maximum impact—the difference is remarkable.
Essential Equipment and Tools
You don’t need a professional kitchen, but certain tools make Gluten Free No Bake recipes significantly more reliable. Here’s my tested equipment list.
Must-Haves
Digital kitchen scale: I swear by my digital scale. After countless recipe failures from volume measurement inconsistencies, I switched to weighing ingredients exclusively. A cup of Gluten Free oats can vary by 20-30 grams depending on how you scoop and settle them. That variance will ruin your ratios.
Food processor: For energy balls, date-based recipes, and nut crusts, a food processor is non-negotiable. I own a 14-cup Cuisinart, but even a smaller 7-cup model works for most recipes. The key is blade sharpness—dull blades will heat your ingredients through friction rather than chopping them cleanly.
Mixing bowls in various sizes: I own three different sets because temperature control matters. Metal bowls are ideal for chocolate work (they conduct temperature well), while glass bowls are perfect for viewing layers in parfaits or trifles.
Quality mixing spoons: I use both silicone spatulas and wooden spoons. Silicone scrapes bowls clean (important when ingredients are expensive), while wooden spoons don’t conduct heat when working with melted chocolate.
Parchment paper and plastic wrap: Line everything. No Bake recipes often stick, and parchment paper makes removal effortless. I also use it to press down cookie bar mixtures—put a sheet over the mixture and press with your hand to get even compression without sticky fingers.
Nice-to-Haves
Cookie scoop set: For uniform energy balls and cookies. I have three sizes (small, medium, large), and they ensure consistent portions, which means consistent texture.
Square baking pans: 8×8 and 9×9 inch pans are my most-used sizes for bar recipes. Metal conducts cold better than glass, so recipes set faster in metal pans.
Offset spatula: This makes spreading layers smooth and professional-looking. I didn’t understand the value until I tried one—now I use it constantly.
Instant-read thermometer: For chocolate work and temperature-sensitive recipes. This eliminates guesswork entirely.
Core Techniques: Mastering the Fundamentals
In my testing, I’ve identified five fundamental techniques that cover 90% of all Gluten Free No Bake recipes. Master these, and you can create countless variations.
Technique 1: The Energy Ball Method
This is your foundation technique. It works for protein balls, energy bites, truffle-style desserts, and date-based confections.
Basic process: Combine sticky ingredients (dates, nut butter, honey) with dry ingredients (oats, nuts, coconut) in a food processor. Process until the mixture holds together when squeezed. Roll into balls and refrigerate.
Key variables: The ratio matters more than specific ingredients. In my testing, I’ve found that 1 part sticky binder to 2 parts dry ingredients works consistently. Too much binder creates an overly soft, almost paste-like texture. Too little, and your balls will crumble.
Common mistakes: Over-processing creates nut butter from your nuts, making everything greasy. I pulse my food processor rather than running it continuously—ten 1-second pulses is better than one 10-second run. Also, if your mixture seems slightly too dry, resist adding more liquid immediately. Let it rest for five minutes—the moisture will distribute, and you might find it’s actually perfect.
Temperature matters: Make these when your kitchen is cool. In summer, I chill my mixing bowl beforehand. Warm ingredients become sticky and difficult to roll.
Technique 2: The Melt-and-Mix Method
This technique creates No Bake cookies, clusters, and bark-style desserts. You’re melting chocolate or a combination of chocolate and nut butter, mixing in add-ins, and letting the mixture set.
Basic process: Melt chocolate and fat (butter, coconut oil, or nut butter) together. Remove from heat and stir in dry ingredients (oats, nuts, coconut, dried fruit). Drop by spoonfuls onto parchment paper and refrigerate.
The science: You’re creating a chocolate matrix that traps other ingredients. As the chocolate solidifies, it locks everything in place. The key is getting your chocolate to the right temperature before adding mix-ins.
Pro tip from my pastry days: temperature matters more than you think. Chocolate should be melted to 90-95°F. Too hot (over 100°F), and you’ll cook any ingredients with moisture (like nut butter), causing separation. Too cool (under 85°F), and the chocolate will seize when you add room-temperature ingredients.
Melting methods: I prefer a double boiler for control, but microwave works if you’re careful. Use 50% power and stir every 30 seconds. Chocolate continues melting from residual heat even after you stop, so I remove it from heat when about 80% is melted and stir until smooth.
Setting time: In my standard 37°F refrigerator, melt-and-mix recipes set in 60-90 minutes. You can put them in the freezer for 30 minutes instead, but be aware this can create condensation on the surface, which affects appearance.
Technique 3: The Pressed Bar Method
This creates cookie bars, date bars, and layered desserts. You’re pressing a mixture firmly into a pan, usually creating multiple layers, and refrigerating until firm.
Basic process: Mix your ingredients, press firmly into a lined pan, add additional layers if desired, and refrigerate until firm enough to slice.
The critical factor: Compression. I’ve tested this extensively, and inadequate pressing is the reason most bar recipes fall apart when sliced. Here’s my method: line your pan with parchment paper, leaving overhang on two sides (this creates handles for removal). Pour in your mixture, place another sheet of parchment on top, and press down firmly with your hands or the bottom of a measuring cup. I apply serious pressure—the mixture should compact to about 75% of its original height.
Slicing technique: After setting, lift the entire block out using your parchment handles. Let it sit at room temperature for five minutes—this prevents cracking. Use a sharp knife and wipe it clean between each cut. For chocolate-topped bars, run your knife under hot water and dry it between cuts—the heat melts through chocolate cleanly.
Technique 4: The Layered Parfait Method
This technique creates trifles, parfaits, and cheesecake-style desserts in glasses or jars. You’re layering different textures and flavors for visual appeal and taste contrast.
Basic process: Create 2-4 components with different textures (crunchy crumbs, creamy filling, fruit layer, whipped topping). Layer them in glasses, allowing each layer to set before adding the next.
Component preparation: Each layer needs the right consistency. Crumb layers should be slightly moist (not dry), cream layers should hold their shape but remain spreadable, and fruit layers should be thick enough not to bleed into other layers.
Assembly strategy: I start with the most structural layer on the bottom—usually a crust or crumb layer. Then add your creamiest, most delicate layer. Top with fruit or whipped cream just before serving, as these can weaken if stored too long.
Storage considerations: Parfaits can become soggy if stored longer than 24 hours. If making ahead, I assemble the stable layers and add the final decorative layer within a few hours of serving.
Technique 5: The No Bake Cheesecake Method
This creates cream cheese-based desserts with a firm, sliceable texture. It relies on whipped cream or whipped coconut cream to provide structure without baking.
Basic process: Create a pressed crust, make a filling by beating cream cheese with sugar and flavoring, fold in whipped cream, spread over crust, and refrigerate several hours until firm.
The science: You’re creating an emulsion of fat (cream cheese) and air (whipped cream). The key is getting your cream cheese to the right consistency before folding in the whipped cream. I leave my cream cheese at room temperature for 30-45 minutes before using—it should be soft enough to beat smooth but not greasy.
Whipping cream properly: For Gluten Free cooking, this is one area where technique truly matters. Start with cold cream (straight from the refrigerator), use a cold bowl, and beat on medium speed until soft peaks form. I’ve tested this at various temperatures, and cold cream whips up to about 30% more volume than room-temperature cream.
Folding technique: Add whipped cream to your cream cheese mixture in three additions. Use a rubber spatula and fold gently from the bottom of the bowl up and over, rotating the bowl as you go. Aggressive mixing deflates your whipped cream and creates a dense, heavy texture instead of light and creamy.
Recipe Categories: From Simple to Spectacular
Let me walk you through the main categories of Gluten Free No Bake recipes, with specific guidance on what works, what doesn’t, and why.
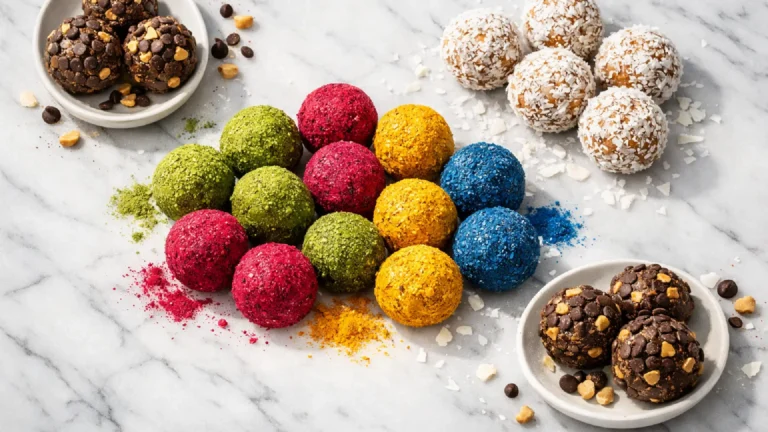
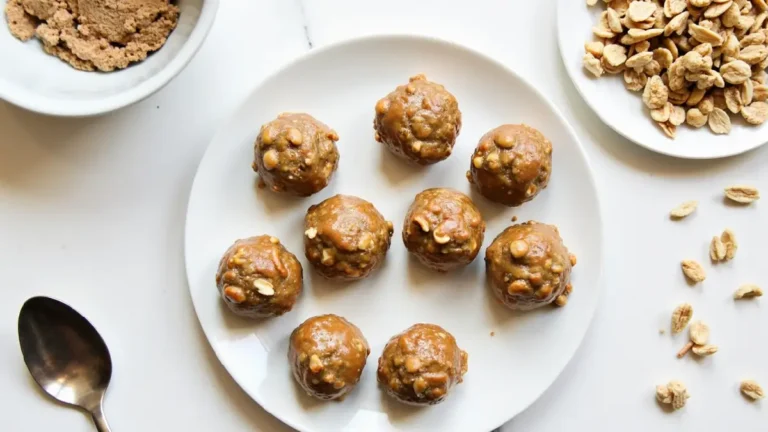
Energy Balls and Bites
These are your gateway to Gluten Free No Bake success. They’re forgiving, require minimal equipment, and are endlessly customizable.
Foundation formula: 1 cup dates (packed), 1 cup nuts, 2 tablespoons nut butter, 1/2 cup mix-ins (oats, coconut, cocoa powder, etc.). This creates approximately 16-18 balls.
Variations I’ve tested successfully:
- Chocolate peanut butter: dates, peanuts, peanut butter, cocoa powder, Gluten Free oats
- Almond joy: dates, almonds, almond butter, coconut, dark chocolate chips
- Lemon coconut: dates, cashews, cashew butter, lemon zest, shredded coconut
- Chai spice: dates, almonds, almond butter, chai spice blend, rolled oats
Storage: In an airtight container in the refrigerator, these last 2 weeks. They also freeze beautifully for up to 3 months. Emma packs two in her lunch box every day, and Jake has them as after-school snacks.
Troubleshooting: If your mixture is too crumbly, add liquid (water, nut butter, or honey) one teaspoon at a time. If it’s too sticky, add more dry ingredients (oats or nuts). The texture should hold together when squeezed but not feel wet or greasy.
No Bake Cookies
These are typically chocolate or nut butter-based, with oats or coconut providing texture. They’re one of the few categories where Gluten Free versions are actually easier than traditional recipes.
Why they work: Traditional No Bake cookies don’t rely on gluten anyway—they get structure from sugar crystallization and fat solidification. Using Gluten Free oats makes virtually no difference to the final result.
Classic formula: Melt chocolate and butter, remove from heat, stir in oats and flavorings, drop onto parchment, refrigerate until set.
Critical success factors: After testing this recipe seventeen times (yes, I counted), I can tell you exactly where things go wrong. The most common mistake is not bringing your sugar mixture to the correct temperature. For traditional stovetop No Bake cookies, you need to boil the butter-sugar-cocoa mixture for exactly 60 seconds. Under-boiling creates cookies that never set properly. Over-boiling makes them dry and crumbly.
Variations worth trying:
- Classic chocolate oat: butter, sugar, cocoa powder, milk, vanilla, Gluten Free oats
- Peanut butter: butter, sugar, milk, peanut butter, Gluten Free oats
- Coconut: butter, sugar, cocoa powder, coconut milk, shredded coconut
- Almond butter chocolate: coconut oil, maple syrup, almond butter, cocoa powder, Gluten Free oats
Cookie Bars and Squares
These pressed bar recipes are incredibly versatile. They work for everything from cookie-dough-style bars to date-based energy bars to chocolate-topped confections.
Base formula: 2 cups dry ingredients (oats, nuts, coconut), 3/4 cup binding ingredients (nut butter, honey, dates), flavorings to taste. Press into an 8×8 pan.
Layering strategies: For two-layer bars, I typically use a 60/40 ratio—60% of the mixture goes in the bottom layer (the crust), and 40% forms the top layer. For three-layer bars, I do 50% base, 30% filling, 20% topping.
My most-requested recipes:
- Peanut butter chocolate bars: oat-peanut base, melted chocolate top
- Date caramel bars: date-nut base, date caramel middle, chocolate top
- Lemon coconut bars: coconut-cashew base, lemon cream filling
- Almond joy bars: coconut-almond base, chocolate ganache top
Storage and portability: These travel beautifully, making them perfect for packed lunches or hiking snacks. Wrap individual bars in parchment paper, then store in an airtight container. They’re fine at room temperature for a few hours, but I keep them refrigerated for longer storage.
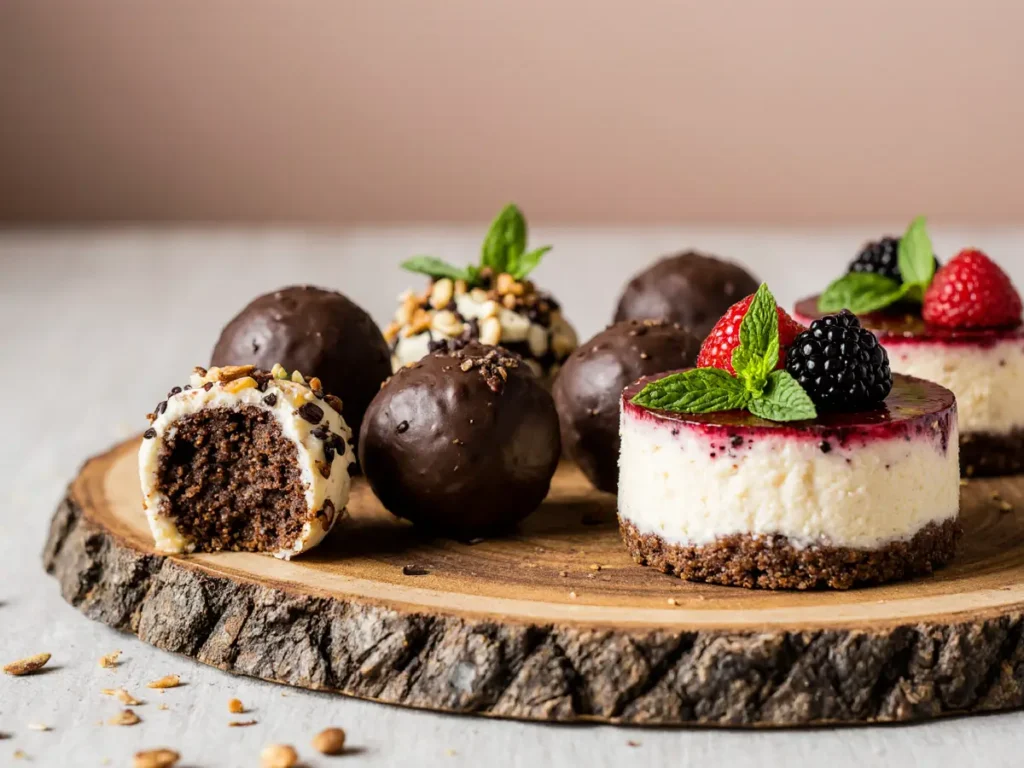
Truffles and Fudge
These are your impressive, gift-worthy recipes. They look sophisticated but are surprisingly simple once you understand the technique.
Basic truffle method: Create a ganache (chocolate melted with cream), flavor it, refrigerate until firm, roll into balls, coat with cocoa powder or chopped nuts.
Temperature control: This is where my pastry background really shows. For smooth, non-grainy truffles, your cream needs to be at 190-200°F when you pour it over chocolate. Too cool, and the chocolate won’t fully melt. Too hot, and you’ll break the emulsion.
Fudge fundamentals: Traditional fudge requires precise temperature control and candy thermometers. No Bake fudge is significantly easier—you’re creating a chocolate mixture held together by condensed milk or coconut cream, then letting it set firm.
Foolproof formula: 2 cups chocolate chips, 1 can sweetened condensed milk (or coconut cream sweetened with honey), flavorings, mix-ins. Melt together, pour into lined pan, refrigerate until firm.
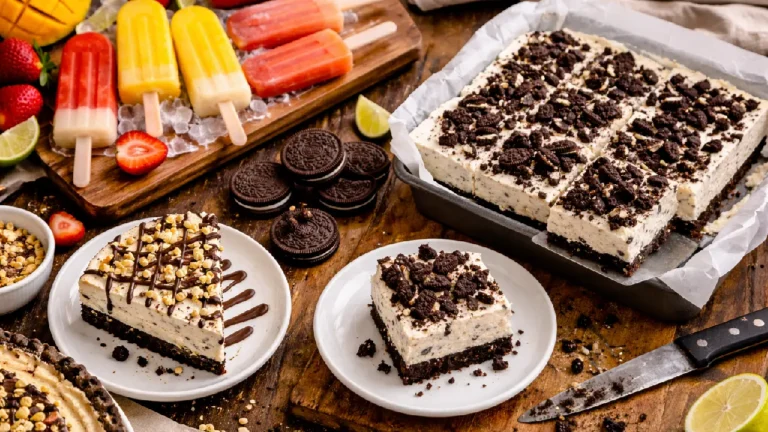
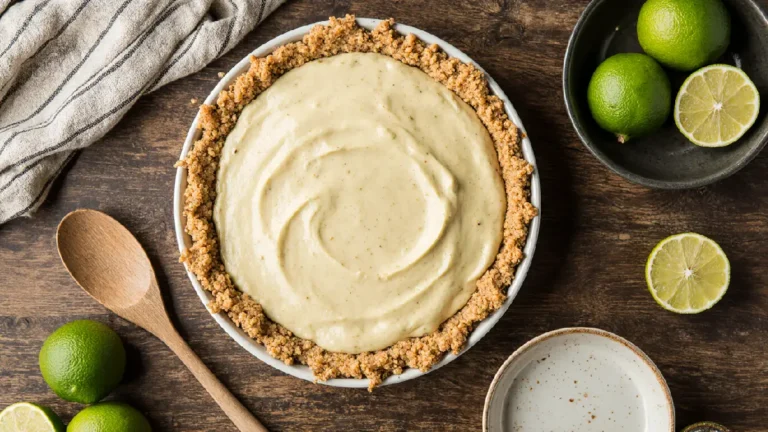
Cheesecakes and Cream Pies
These are show-stopping desserts that look bakery-quality but require no oven time. They’re perfect for summer entertaining when you don’t want to heat up your kitchen.
Crust options: Graham cracker crusts (using Gluten Free graham crackers), cookie crusts (using Gluten Free sandwich cookies), or nut crusts (ground nuts with dates or coconut oil).
Filling fundamentals: The traditional method uses cream cheese whipped with sugar and folded with whipped cream. For dairy-free versions, coconut cream whips surprisingly well—just refrigerate the can overnight and whip only the thick cream that separates from the liquid.
Setting time: These need serious refrigeration time. I tell readers to plan for minimum 4 hours, but overnight is better. The filling firms as it chills, transforming from a thick cream into something sliceable.
Flavor variations I recommend:
- Classic vanilla: straightforward cream cheese filling with vanilla bean paste
- Chocolate: add melted and cooled chocolate to your cream cheese mixture
- Lemon: add lemon zest and juice, reduce other liquid accordingly
- Strawberry: fold in fresh diced strawberries just before refrigerating
- Peanut butter: beat peanut butter into cream cheese before adding cream
Frozen Desserts
While technically not “No Bake,” these frozen treats fit perfectly into this category since they require no oven time.
Ice cream-style desserts: Blended frozen bananas create an ice cream-like texture. Add cocoa powder, nut butter, or fresh fruit for flavor variations. I grow my own mint specifically for mint chocolate “nice cream,” and my kids request it constantly.
Frozen bars and popsicles: These use coconut cream, yogurt, or fruit purees as a base, often with layers or mix-ins for visual appeal.
Setting considerations: Frozen desserts become rock-hard in the freezer. I’ve found that removing them 5-10 minutes before serving creates a better texture. For popsicles, run the mold briefly under warm water to release them easily.
Dietary Modifications and Substitutions
After years of adapting recipes for various dietary needs, here’s what actually works (and what doesn’t).
Dairy-Free Adaptations
Most Gluten Free No Bake recipes adapt easily to dairy-free. Here are my tested substitutions:
Butter: Coconut oil works in a 1:1 ratio. For recipes where butter flavor matters, I use a combination of coconut oil and vegan butter.
Cream cheese: Dairy-free cream cheese alternatives vary significantly in quality. Kite Hill brand is my preferred option—it has the right tang and texture. Avoid overly soft varieties that won’t hold structure.
Heavy cream: Full-fat coconut cream whips beautifully. Refrigerate the can overnight, open it carefully without shaking, and scoop out only the thick cream on top. Whip it exactly like dairy cream.
Milk: Any non-dairy milk works. I prefer oat milk for its neutral flavor and creamy texture, but almond, coconut, and cashew milks all work fine.
Nut-Free Options
This requires more creativity since nuts and nut butters are foundation ingredients in many No Bake recipes.
Nut butter substitutes: Sunflower seed butter works in a 1:1 ratio. Tahini (sesame paste) also works but has a stronger flavor—I reduce the amount by 25% and add a touch more sweetener.
Ground nuts: Replace with sunflower seeds or pumpkin seeds. Toast them first for better flavor, then grind in a food processor.
Almond flour: Coconut flour is not a 1:1 substitute (it absorbs much more liquid). Instead, use additional Gluten Free oats, ground seeds, or Gluten Free cookie crumbs.
Sugar Alternatives
My husband’s diabetes has made me an expert in sugar substitution. Here’s what I’ve learned through extensive testing:
For binding and structure: Honey, maple syrup, and dates provide both sweetness and binding power. Artificial sweeteners don’t bind, so you’ll need to adjust the recipe structure.
Granulated sugar substitutes: Monk fruit sweetener blends (with erythritol) work well in a 1:1 ratio. Pure stevia is far too concentrated—use it sparingly and expect flavor changes.
Powdered sugar alternatives: Make your own by blending granulated alternatives in a high-speed blender until powdery. The texture won’t be quite as fine as commercial powdered sugar, but it works.
Important note: Sugar substitutes affect texture and setting time. Recipes may need slightly longer refrigeration, and the final texture might be less creamy due to different moisture-retention properties.
Vegan Modifications
Combining Gluten Free and vegan can be challenging since many Gluten Free No Bake recipes rely heavily on dairy products.
Key considerations: Replace all dairy (see dairy-free section above), use maple syrup or agave instead of honey (honey isn’t vegan), and verify that your chocolate chips don’t contain milk fat.
Gelatin alternatives: For recipes calling for gelatin, use agar powder instead. The ratio is different—use 1 teaspoon agar powder for every tablespoon of gelatin, and boil it briefly to activate.
Troubleshooting Common Problems
I’ve encountered every possible failure point in No Bake recipes, and I’ve learned to fix (or prevent) nearly all of them.
Issue: Mixture Won’t Hold Together
Cause: Insufficient binding ingredients or mixture is too warm.
Solution: Add more sticky ingredients (nut butter, honey, dates) one tablespoon at a time, mixing well after each addition. Alternatively, refrigerate the mixture for 15-20 minutes and try again—sometimes it just needs to firm up slightly.
Prevention: Follow ratios carefully, especially when substituting ingredients. Also, measure accurately—this is where my kitchen scale becomes essential.
Issue: Too Soft or Won’t Set
Cause: Too much liquid, insufficient refrigeration time, or warm storage temperature.
Solution: For chocolate-based recipes, try freezing instead of refrigerating. For cream-based recipes, ensure your refrigerator is cold enough (ideally 37°F). If the recipe still won’t set, you may need to add a firming agent like additional melted chocolate or coconut oil.
Prevention: Follow refrigeration times as minimums, not suggestions. When I say “refrigerate 2 hours,” I mean it—60 minutes won’t work.
Issue: Too Hard or Dry
Cause: Over-processing, too many dry ingredients, or over-refrigeration.
Solution: Let the dessert sit at room temperature for 10-15 minutes before serving. For future batches, reduce dry ingredients by 10-15% or add more binding ingredients.
Prevention: Don’t over-process in the food processor. Pulse rather than running continuously. Also, store properly—refrigerated is usually sufficient. Freezing makes most No Bake recipes too hard.
Issue: Chocolate Seized or Became Grainy
Cause: Water contact or overheating.
Solution: If chocolate seizes (becomes thick and grainy), you can sometimes save it by adding fat—try stirring in coconut oil or vegetable oil one teaspoon at a time until smooth again.
Prevention: Keep all water away from melting chocolate. Even a single drop will cause problems. Melt gently using indirect heat or low microwave power. If adding liquid ingredients (like vanilla extract), add them to other ingredients first rather than directly to chocolate.
Issue: Layers Sliding Apart
Cause: Layers weren’t given adequate setting time between additions, or temperatures were wrong.
Solution: For already-made desserts, refrigerate longer and slice carefully with a sharp, clean knife. For future batches, ensure each layer is completely set before adding the next.
Prevention: This is about patience. I typically wait 30-60 minutes between layers, checking that the first layer is firm to the touch before proceeding. Also, slightly warm your second layer so it bonds better to the first—but not so warm that it melts the first layer.
Issue: Falling Apart When Slicing
Cause: Inadequate compression, insufficient binding ingredients, or slicing while too cold.
Solution: Let bars or cheesecakes sit at room temperature for 5-10 minutes before slicing. Use a sharp knife and wipe it clean between cuts.
Prevention: Press firmly when making bars—I cannot emphasize this enough. Use parchment paper on top and apply serious pressure. For cheesecakes, ensure adequate refrigeration time for the filling to fully set.
Issue: Grainy or Separated Filling
Cause: Ingredients were at different temperatures, or mixing was too aggressive.
Solution: Unfortunately, this is hard to fix after the fact. You might be able to re-blend and re-set, but texture will still be compromised.
Prevention: Bring all ingredients to similar temperatures before mixing. Don’t over-beat cream cheese—mix just until smooth. Fold whipped cream gently rather than stirring vigorously.
Troubleshooting Common Problems
Select an issue below to see detailed solutions based on extensive testing and food science principles
Mixture Won’t Hold Together
Your ingredients won’t bind or balls keep crumbling apart
Too Soft or Won’t Set
Recipe stays liquid or doesn’t firm up properly
Too Hard or Dry
Final product is rock-hard or has a dry texture
Chocolate Seized or Grainy
Melted chocolate became thick, grainy, or separated
Layers Sliding Apart
Multi-layer desserts won’t stay together
Falls Apart When Slicing
Bars or cheesecakes crumble when you cut them
Mixture Won’t Hold Together
When your ingredients won’t bind or balls keep crumbling
This typically happens due to insufficient binding ingredients or because your mixture is too warm. The ratio of wet to dry ingredients is critical in no-bake recipes.
- Add more sticky ingredients (nut butter, honey, or dates) one tablespoon at a time, mixing well after each addition
- Refrigerate the mixture for 15-20 minutes and try again—sometimes it just needs to firm up slightly
- Add a small amount of liquid (1-2 teaspoons water or milk) to help ingredients bind
- If using dates, ensure they’re soft and fresh—soak dried-out dates in warm water for 10 minutes
- Follow ratios carefully—use a kitchen scale for accuracy rather than eyeballing measurements
- Make recipes when your kitchen is cool—warm ingredients become sticky and difficult to work with
- Process dates properly—they should be broken down into small sticky pieces, not left in chunks
- Don’t skip the resting time—let the mixture sit for 5 minutes after mixing; moisture will distribute evenly
Too Soft or Won’t Set
When your recipe stays liquid or doesn’t firm up properly
This issue stems from too much liquid, insufficient refrigeration time, or a warm storage temperature. Chocolate-based recipes need proper cooling to solidify, while cream-based recipes need time to set.
- For chocolate-based recipes: Try freezing instead of refrigerating for 30-45 minutes to speed up setting
- Check your refrigerator temperature: It should be 37°F (3°C) or colder. A warmer fridge can add 30-60 minutes to setting time
- If still not setting after extended time: You may need to remix and add a firming agent like additional melted chocolate, coconut oil, or gelatin
- For cream-based desserts: Ensure you whipped your cream to stiff peaks, not just soft peaks
- Follow minimum refrigeration times as true minimums—when I say “refrigerate 2 hours,” 60 minutes won’t work
- Reduce liquid ingredients by 10-15% when using gluten-free oats (they absorb moisture differently)
- Use full-fat ingredients—low-fat cream cheese or reduced-fat coconut milk won’t set properly
- Don’t rush the process—overnight refrigeration often yields the best results
Too Hard or Dry
When your final product is rock-hard or has a dry texture
This happens from over-processing ingredients, too many dry ingredients, or over-refrigeration/freezing. The balance between wet and dry components is off.
- Let dessert sit at room temperature for 10-15 minutes before serving—this softens the texture considerably
- If frozen: Transfer to refrigerator and let thaw for 1-2 hours instead of serving directly from freezer
- For energy balls: Warm them briefly between your palms before eating
- For future batches: Reduce dry ingredients by 10-15% or add more binding ingredients
- Don’t over-process—pulse your food processor instead of running it continuously
- Store properly—refrigerated is usually sufficient; freezing makes most no-bake recipes too hard
- Increase wet ingredients slightly—add an extra tablespoon of nut butter or honey
- Cover storage containers to prevent moisture loss during refrigeration
Chocolate Seized or Became Grainy
When melted chocolate becomes thick, grainy, or separated
Chocolate seizes when it comes in contact with water or steam, or when it’s overheated. Even a single drop of water will cause chocolate to seize into a thick, grainy mass.
- If chocolate seized: Add fat to save it—stir in coconut oil or vegetable oil one teaspoon at a time until smooth again
- Start over if severely overheated: Burned chocolate tastes bitter and cannot be saved
- For minor graininess: Add 1-2 tablespoons of warm cream or milk and stir vigorously
- Temperature fix: If chocolate is too thick from cooling, gently reheat it to 90-95°F
- Keep all water away from melting chocolate—ensure bowls and utensils are completely dry
- Use proper melting method: Double boiler (preferred) or microwave at 50% power, stirring every 30 seconds
- Remove from heat early: Stop when chocolate is 80% melted and stir until smooth—residual heat will finish melting
- Add liquid ingredients to other ingredients first rather than directly to chocolate (especially vanilla extract)
- Use an instant-read thermometer for precision and consistency
Layers Sliding Apart
When multi-layer desserts won’t stay together
Layers slide when they weren’t given adequate setting time between additions, or when temperatures were incompatible. Each layer needs to be firm before adding the next.
- Refrigerate longer: Give the entire dessert several additional hours (or overnight) to fully set
- Slice carefully: Use a sharp knife, wipe it clean between cuts, and slice with gentle pressure
- Serve chilled: Keep dessert cold until the moment of serving—room temperature makes layers slide more
- For chocolate-topped bars: Run your knife under hot water, dry it, then slice quickly while knife is warm
- Ensure first layer is completely set before adding the second—it should feel firm when touched
- Slightly warm your second layer so it bonds better (but not so warm that it melts the first layer)
- Score the first layer lightly with a fork to create texture that helps layers bond
- Plan your timing: Multi-layer desserts benefit from overnight refrigeration
- Use parchment paper for removal rather than flipping the pan—less stress on layers
Falls Apart When Slicing
When bars or cheesecakes crumble when you cut them
This results from inadequate compression, insufficient binding ingredients, or slicing while too cold. Proper pressing and the right tool make all the difference.
- Let sit at room temperature for 5-10 minutes before slicing—frozen desserts are more brittle
- Use a sharp, clean knife: Wipe the blade clean between each cut
- Apply gentle, even pressure: Don’t saw back and forth—use one smooth downward motion
- For chocolate-topped items: Score the top layer first with a hot knife, then cut through completely
- Use dental floss trick: For soft cheesecakes, use unflavored dental floss to slice—it cuts cleanly without pressure
- Press firmly when making bars: Use parchment paper on top and apply real pressure
- Ensure adequate refrigeration time: Fillings need to fully set before slicing
- Add more binding ingredients: If recipe consistently crumbles, increase dates, nut butter, or honey by 15-20%
- Use proper pan size: Too large a pan creates thin, fragile bars; too small makes them hard to press evenly
- Create clean edges: Line pan with parchment overhang to lift entire block out before slicing
Select a problem above to see detailed troubleshooting solutions
Storage, Food Safety, and Shelf Life
Proper storage is critical for Gluten Free No Bake recipes, both for food safety and optimal texture.
Refrigeration Guidelines
Most No Bake recipes require refrigeration. The exceptions are recipes that contain no dairy, eggs, or cream-based components and have moisture content below 15% (like some energy balls made only with dates and nuts).
Standard storage times:
- Energy balls and bites: 2 weeks in refrigerator, 3 months in freezer
- No Bake cookies: 1 week in refrigerator, 2 months in freezer
- Cookie bars: 1 week in refrigerator, 2 months in freezer
- Cheesecakes: 3-5 days in refrigerator, 1 month in freezer
- Cream-based desserts: 2-3 days in refrigerator, not recommended for freezing
Storage containers: Use airtight containers to prevent moisture absorption and odor transfer. I line containers with parchment paper between layers to prevent sticking.
Food Safety Considerations
Cross-contamination: For those with celiac disease, cross-contamination is a serious concern. I maintain separate storage containers, cutting boards, and wooden utensils for Gluten Free cooking. Even tiny amounts of gluten can cause reactions in sensitive individuals.
Cream cheese safety: Never leave cream cheese-based desserts at room temperature for more than 2 hours. At summer picnics or parties, I use ice packs or coolers to keep things cold.
Raw ingredients: Some recipes use raw eggs (like certain mousse recipes). I always use pasteurized eggs when working with raw preparations. Alternatively, use aquafaba (chickpea liquid) as an egg white substitute—it whips up similarly and eliminates food safety concerns.
Freezing and Thawing
What freezes well: Energy balls, cookie bars, truffles, and some cheesecakes all freeze beautifully. Wrap individual portions in parchment paper, then place in a freezer-safe container or bag.
What doesn’t freeze well: Cream-based desserts with whipped cream can become watery and separated upon thawing. Parfaits and layered desserts lose their textural contrast.
Thawing method: Transfer from freezer to refrigerator and let thaw overnight. Never thaw at room temperature—this creates temperature abuse conditions where bacteria can multiply rapidly.
Seasonal Variations and Holiday Adaptations
One advantage of No Bake recipes is how easily they adapt to seasonal flavors and holiday themes.
Summer Recipes
When it’s hot outside, I focus on recipes with bright, refreshing flavors and frozen components.
Seasonal flavors: Lemon, lime, berry, coconut, mint, and tropical fruit all work beautifully. I grow my own mint and use it in mint chocolate energy balls and mint coconut cream pie.
Presentation tips: Use individual serving glasses for parfaits, keeping them refrigerated until service. For outdoor events, I keep desserts in a cooler with ice packs until the last possible moment.
Popular summer requests: Frozen chocolate-covered banana bites, lemon coconut bars, berry parfaits, key lime pie bars, frozen coconut cream bars.
Fall and Winter Recipes
Warm spices and rich flavors take center stage when the weather turns cold.
Seasonal flavors: Pumpkin spice, cinnamon, ginger, nutmeg, maple, apple, cranberry, and dark chocolate. I make spiced No Bake bars with warming spices that feel appropriately cozy.
Texture adjustments: I add more nuts and seeds in fall recipes for additional crunch and heartiness. Dried fruits like figs, dates, and cranberries also feel seasonally appropriate.
Holiday favorites: Gingerbread energy balls, pumpkin pie bars, cranberry pecan bars, maple walnut fudge, peppermint chocolate truffles.
Holiday-Specific Ideas
Thanksgiving: Pumpkin pie cheesecake bars, pecan pie energy balls, cranberry white chocolate bark
Christmas: Peppermint chocolate truffles, gingerbread cookie balls, eggnog cheesecake (made with eggnog-flavored cream cheese filling)
Valentine’s Day: Chocolate-covered strawberry bark, raspberry truffle bars, red velvet cheesecake bites
Easter: Lemon coconut nests, carrot cake energy balls, pastel-colored white chocolate bark
Fourth of July: Berry-layered parfaits with blueberries and strawberries, red-white-and-blue cheesecake bars
Making It Your Own: Customization and Creativity
After years of recipe development, I’ve learned that the best recipes emerge when you understand the framework well enough to innovate confidently.
Flavor Pairing Principles
Certain flavors naturally complement each other. Here are combinations I return to repeatedly:
Chocolate-based: Chocolate + peanut butter, chocolate + mint, chocolate + orange, chocolate + raspberry, chocolate + coconut, chocolate + coffee
Nut-based: Almond + cherry, cashew + vanilla, pecan + maple, walnut + date, peanut + banana
Fruit-forward: Lemon + blueberry, lime + coconut, orange + cranberry, strawberry + vanilla
Spice-enhanced: Cinnamon + apple, ginger + molasses, cardamom + pistachio, chai spice + honey
Building Your Own Recipe
Start with a proven foundation, then customize from there. Here’s my framework:
Step 1 – Choose your base technique: Energy ball method, melt-and-mix method, pressed bar method, layered method, or cheesecake method.
Step 2 – Select your binding agent: Dates, nut butter, honey, maple syrup, melted chocolate, or cream cheese.
Step 3 – Pick your structural ingredients: Oats, nuts, coconut, cookies, or cream.
Step 4 – Add flavor: Extracts, spices, cocoa powder, citrus zest.
Step 5 – Include mix-ins: Chocolate chips, dried fruit, seeds, shredded coconut.
Step 6 – Test and adjust: Make a small batch first. Adjust ratios based on results.
Adapting Traditional Recipes
If you have a favorite baked recipe you’d like to convert to No Bake, here’s my approach:
Analyze the structure: What makes the original recipe work? If it’s flour creating structure, you’ll need a different approach entirely. If it’s just holding ingredients together while they bake, you can probably adapt it.
Identify similar No Bake recipes: Find a No Bake recipe with a similar flavor profile or texture goal. Use its technique as your starting point.
Test incrementally: Don’t assume your first attempt will be perfect. I typically test new adaptations 3-5 times before I’m satisfied.
Resources and Next Steps
Essential Reading
While I’ve covered the fundamentals here, deepening your understanding of food science will make you a better intuitive cook. I recommend “The Food Lab” by J. Kenji López-Alt for understanding technique fundamentals, and various online resources for Gluten Free specific information.
Finding Reliable Recipes
When searching for Gluten Free No Bake recipes online, look for:
- Recipes with detailed instructions and explanation of why things work
- Reviews from people who actually made the recipe
- Photos showing the finished product
- Adaptation notes for dietary modifications
- Specific ingredient brands (suggests the author tested thoroughly)
Building Your Skills Progressively
Don’t start with the most complex recipe. Here’s the progression I recommend:
Week 1: Make energy balls. This teaches you the food processor method and basic ingredient ratios.
Week 2: Try No Bake cookies. This introduces you to the melt-and-mix method and temperature control.
Week 3: Make cookie bars. This teaches pressing technique and proper storage.
Week 4: Attempt a layered parfait. This develops your assembly skills.
Week 5: Try a cheesecake. This combines multiple techniques and requires patience.
Equipment Investment Strategy
If you’re just starting out, don’t buy everything at once. Here’s what to prioritize:
First purchase: Digital kitchen scale. This single tool will improve your results more than anything else.
Second purchase: Food processor. This opens up entirely new recipe categories.
Third purchase: Quality mixing bowls in various sizes.
Fourth purchase: Digital thermometer for chocolate work.
Frequently Asked Questions
There are countless delicious gluten-free dishes across all cuisines! Some excellent options include:
- Naturally gluten-free meals: Grilled meats with roasted vegetables, rice bowls with proteins and fresh toppings, corn-based tacos with your favorite fillings, and fresh salads with grilled chicken or fish.
- Adapted favorites: Gluten-free pasta dishes using rice or chickpea pasta, cauliflower pizza with creative toppings, lettuce wrap burgers, and zucchini noodle stir-fries.
- International options: Thai curries with rice, Indian dal with rice or gluten-free naan, Mexican fajitas with corn tortillas, and Japanese sushi rolls.
- Comfort foods: Shepherd’s pie with mashed potato topping, risotto with various proteins and vegetables, and polenta-based dishes.
The key is focusing on whole foods and naturally gluten-free ingredients like rice, quinoa, potatoes, corn, and fresh proteins and vegetables.
Many desserts are naturally gluten-free or easily adapted! Here are some that might surprise you:
- Chocolate-based treats: Flourless chocolate cake, chocolate mousse, chocolate truffles, and most chocolate puddings are naturally gluten-free.
- Fruit desserts: Pavlova (meringue with fruit), panna cotta, crème brûlée, and most sorbets contain no gluten.
- No-bake options: Cheesecakes (with gluten-free crust), energy balls, chocolate bark, and coconut macaroons.
- International sweets: Macarons (French almond cookies), mochi (Japanese rice cakes), flan, and many Indian sweets made from rice flour or chickpea flour.
- Frozen treats: Most ice creams, gelato, and frozen yogurts are gluten-free (always check for cookie mix-ins).
The surprising part is that many classic desserts never contained gluten in the first place—they rely on eggs, sugar, and dairy for structure rather than flour!
Yes! No-bake cheesecake filling is naturally gluten-free. The traditional filling contains only:
- Cream cheese
- Sugar (or powdered sugar)
- Heavy cream or whipped cream
- Vanilla extract
- Optional: lemon juice, gelatin for stability
Important considerations:
- The filling is gluten-free, but the crust typically isn’t. Traditional graham cracker crusts contain gluten.
- Use gluten-free graham crackers, gluten-free cookies, or make a nut-based crust instead (ground almonds or pecans with dates or coconut oil).
- Always check labels on flavored cream cheese products—some may contain gluten-containing additives.
- Verify that any mix-ins (cookie pieces, candy bars) are certified gluten-free.
- Watch for cross-contamination if using shared utensils or mixing bowls.
With a proper gluten-free crust, no-bake cheesecake is one of the easiest and most reliable gluten-free desserts you can make!
The gluten-free snack market has exploded in recent years! Here are the most popular options:
- Naturally gluten-free classics: Popcorn, nuts and seeds, fresh fruit, vegetable sticks with hummus, hard-boiled eggs, and cheese.
- Energy and protein options: No-bake energy balls, protein bars (check labels), nut butter packets, trail mix, and Greek yogurt.
- Crunchy snacks: Rice cakes, gluten-free pretzels, corn chips with salsa or guacamole, roasted chickpeas, and kale chips.
- Sweet treats: Dark chocolate, gluten-free granola bars, dried fruit, rice crispy treats made with gluten-free cereal, and gluten-free cookies.
- Convenient packaged options: Many brands now offer gluten-free crackers, chips, and snack bars—look for certified gluten-free labels for safety.
Pro tip: Many naturally gluten-free whole foods make the best snacks—they’re healthier, less processed, and you don’t need to worry about reading labels!
Conclusion: Your Gluten Free No Bake Journey
I’ve spent years testing, failing, adjusting, and perfecting Gluten Free No Bake recipes. What started as a necessity when my husband was diagnosed with celiac disease became a passionate specialty. The beauty of this category is that it removes many of the challenges of traditional Gluten Free baking while delivering desserts that are just as satisfying—sometimes even more so.
Emma calls these “science cookies” because I always explain what’s happening as we make them, and that’s exactly the approach I encourage you to take. Understand the science, master the core techniques, and you’ll have the confidence to create countless variations.
Start simple. Choose an energy ball recipe and make it this week. Pay attention to textures, ratios, and how ingredients behave together. Once you’ve mastered that foundation, move on to another technique. Build your skills progressively, and before long, you’ll be creating your own original recipes.
The most important thing I’ve learned over twelve years of recipe development? Precision matters, but perfection doesn’t. You’ll have failures—I still do. But each failure teaches you something valuable about ingredient behavior, ratios, or technique. Embrace the learning process, trust the science, and enjoy the delicious results.
Your Gluten Free No Bake journey starts now. I’m excited to see where it takes you.
For more recipes follow us on Facebook and Pinterest.
Did you try it?
There are no reviews yet. Be the first one to write one.